


特集・コラム
2025/11/13【実話】6%還元クレカで「ポイ活」し過ぎたらAmazonアカウント停止!?仮想通貨も貰えるクレカ体験記
「ポイント●倍デー」「今月のお得なキャンペーン」「決済方法の使い分け」… 皆さん、ポイ活頑張ってますか? ライターのよきょいです。少しでもお得に、少しでも賢く生活するために日々情報収集と実践を繰り返す。その努力、痛いほどわかります。 でも、最近こう思いませんか? 「あれだけ頑張ってるのに、ポイント還元、年々渋くなってない…?」 楽天経済圏の改悪、PayPayの条件変更、クレカの複雑なポイントアップ条件…。私たちが費やす労力に対して、得られるリターンが見合わなくなりつつあります。 何を隠そう、私自身も「お得」を追求するあまり、先日とんでもない失敗をやらかしました。 高還元率の「Triaカード」を手に入れて、Amazonで「出来高」を稼ごうとした結果、Amazonのアカウントが停止(ロック)されてしまったんです…。 今日は、その失敗談と、それでも私がそのTriaカードを全力でおすすめする「本当の理由」について、包み隠さずお話しします。 最大6%のキャッシュバック|仮想通貨クレジットカード「Tria」【早期割引中】 失敗談:Amazonアカウント停止事件の顛末 私が新しく手に入れた「Triaカード」はとにかく還元率が異常に高かったんです。なんと驚異の6%! 1万円分の買い物をすると600円が返ってきます。楽天カードやAmazonカードが基本1%ということを考慮すると6倍もお金が返ってきます。 しかも、使えば使うほど還元とはまた別に追加報酬がもらえるというカードでした。 とはいえ、無駄なものを買ってしまうとその分損失が出ます。1万円を手に入れるために2万円を費やしたら元も子もありません。 そこで私は、ポイ活の常套手段である「金券」に目をつけました。 「Amazonギフトカードを買えば、手持ち資金を減らさずに『出来高』だけ稼げる!」 これが全ての始まりでした。 意気揚々と20万円ほどのAmazonギフトカードをTriaカードで購入した瞬間…突然Amazonからログアウト。 再ログインしようとしても「新しくアカウントを作成する」と表示されるだけ。元からあったギフトカード残高もAmazonポイントも、全て消し飛ぶ可能性が出てきました。 慌ててサポートセンターに電話した結果、原因は「短期間で大量の金券を購入したため第三者による不正アクセスを疑われ、アカウントが保護停止された」とのこと。 幸い2日後には無事アカウントは復活しましたが、冷や汗ものでした。 ただここで誤解しないでほしいのは、「これはカードが悪いわけでは一切ない」ということです。どのクレジットカードでやっても同じ結果になっていたでしょう。 私の「お得」への渇望とAmazonの強固なセキュリティが生んだただの事故でした。 そうした事態を引き起こすくらいにTriaカードは非常に魅力的だったんです笑 Triaカードを申し込む ポイ活の常識を破壊する仮想通貨クレカ「Tria」 「仮想通貨」と聞いただけで「難しそう」「怪しい」とページを閉じようとした方、ちょっと待ってください! Triaがなぜ「ポイ活勢」にとって最強のツールなのか、既存のクレカやポイントサービスと比較しながら、その核心を解説します。 還元率がバグってる:「最大6%」のキャッシュバック まず、数字が違います。Triaの最大還元率は最大6%です。 楽天カード(1%)や一般的なゴールドカード(1.5%)と比較してみてください。Triaは、日常のあらゆる支払いで、彼らの何倍もの還元を受けられる可能性があります。 コンビニのコーヒー スーパーの買い物 Amazonや楽天でのショッピング 公共料金や税金の支払い これら全てが6%還元の対象になるとしたら、あなたのポイント収支はどう変わるでしょうか? プレミアムカードの購入には225ドル(年会費)がかかりますが、年間で56万円(3750ドル)を使えば元が取れます。 56万円といえば額が大きいようにも思いますが、日々の家賃や光熱費の支払いをTriaで行うとすれば半年もせずに回収可能。56万円以降は支払いのたびに6%が返ってきます。 還元は「Triaトークン」という仮想通貨で行われます。これが「ポイント」と決定的に違う点であり、後述する「エアドロップ」にも繋がります。 いつもの店で使える:「VISA」対応 「還元率が良くても仮想通貨クレカでしょ?使える店が少ないんじゃ…?」 ご安心ください。TriaはVISAタッチ決済に対応しています。 つまり、全世界のVISA加盟店であなたの手持ちのクレジットカードと「全く同じように」使えます。 新しい店を探す必要も特別なアプリを立ち上げる必要もありません。いつもの支払いをTriaに変える。 たったそれだけで生活が「ポイ活」に変わるのです。 クレカ作成の常識を破壊:「審査不要」 ポイ活勢にとって地味に面倒なのが「クレカ発行の手間」と「審査」です。 Triaは、従来のクレジットカードとは異なり、面倒な信用情報審査が不要です。 (※一部、基本的な本人確認(KYC)は必要です) 使いたいと思ったその日に、すぐに使い始められる手軽さ。これもTriaが「次世代」と呼ばれる理由です。 Triaカードを申し込む 私が本当に狙っていたもの「エアドロップ」 さて、ここからが本題です。 私がAmazonアカウントを危険にさらしてまで「出来高」を稼ぎたかった理由。 それは、6%の還元(キャッシュバック)ですらありません。 私が本気で狙っていたのは「エアドロップ(無料配布)」です。 エアドロップとは? ポイ活勢の皆さんには「?」かもしれませんが、仮想通貨の世界では「プロダクトを初期から使ってくれた人に、感謝の印として自社のトークン(コイン)を無料で配る」という文化があります。 これを「エアドロップ」と呼びます。 Triaもこのエアドロップを予定しています。 分かりやすく言うと、「Triaカードを使えば使うほど6%の還元ポイントとは別に、『将来とんでもない価値がつくかもしれない宝くじ』が自動的に溜まっていく」 という状態です。 驚異の50%キャッシュバック この「エアドロップ」で、実際に何が起きたのか? Triaと非常に似た「カード利用」でトークンが貰えるプロジェクトCypherでは、初期にカードを使っていたユーザーに500万円のエアドロップが行われたことが報告されています。 Cypher @Cypher_HQ_ 初期ユーザーとしてずっとカード使ってたんですが、 なんと $35,000(約500万円) のエアドロが降ってきました🤣(193,600枚) 普通に便利だから使ってただけなのに…これはヤバい😂 Cypherはプレミアムプランに入ると 手数料ほぼ0で ・サポート爆速 ・チーム超優秀… pic.twitter.com/nK10B4s4NH — ようすけ@垢バン、作り直し (@yousukeakaban) October 6, 2025 このユーザーが決済に使った額はエアドロ額の2倍ほど(約1000万円)とのことであり、なんと驚異の50%キャッシュバックとなっていました。 私がやっていたのは「6%還元」という目先の利益だけでなく、この「Cypherの再来」という一発逆転のチャンスを掴むための「出来高稼ぎ」だったのです。 (※やり過ぎてAmazonに怒られましたが…) 今すぐ行動すべき理由:この「祭り」は始まったばかり このエアドロップへの期待感は、Triaトークンが取引所に「上場(公開)」される前の、今、この瞬間がピークです。 なぜなら、トークンが公開されて誰でも買えるようになったら「初期ユーザー」への感謝(=エアドロップ)の必要がなくなるからです。 楽天ポイントは1ポイント=1円のままですが、Triaトークンは将来1トークンが10円にも100円にもなる可能性があります(もちろん、その逆のリスクもあります)。 この「ポイント集め」とは次元の違う新しい資産形成のチャンス。 審査不要でVISAとして日常使いできる「Tria」だからこそ、ポイ活勢のあなたに強くおすすめしたいのです。 私のAmazon事件はやりすぎでしたが、それほどまでに「Tria」には熱狂させる魅力があります。 6%還元で日々のポイ活を最強にしつつ未来の「エアドロップ」に備えましょう。 行動するなら、今です。 Triaカードを申し込む (限定アクセスコード:MWVJXJ6475) 免責事項 ・本記事は情報提供のために作成されたものであり、暗号資産や証券その他の金融商品の売買や引受けを勧誘する目的で使用されたり、あるいはそうした取引の勧誘とみなされたり、証券その他の金融商品に関する助言や推奨を構成したりすべきものではありません。 ・本記事に掲載された情報や意見は、当社が信頼できると判断した情報源から入手しておりますが、その正確性、完全性、目的適合性、最新性、真実性等を保証するものではありません。 ・本記事上に掲載又は記載された一切の情報に起因し又は関連して生じた損害又は損失について、当社、筆者、その他の全ての関係者は一切の責任を負いません。暗号資産にはハッキングやその他リスクが伴いますので、ご自身で十分な調査を行った上でのご利用を推奨します。(その他の免責事項はこちら) *キャッシュバックはTriaトークン公開3ヶ月後に付与されます
特集・コラム
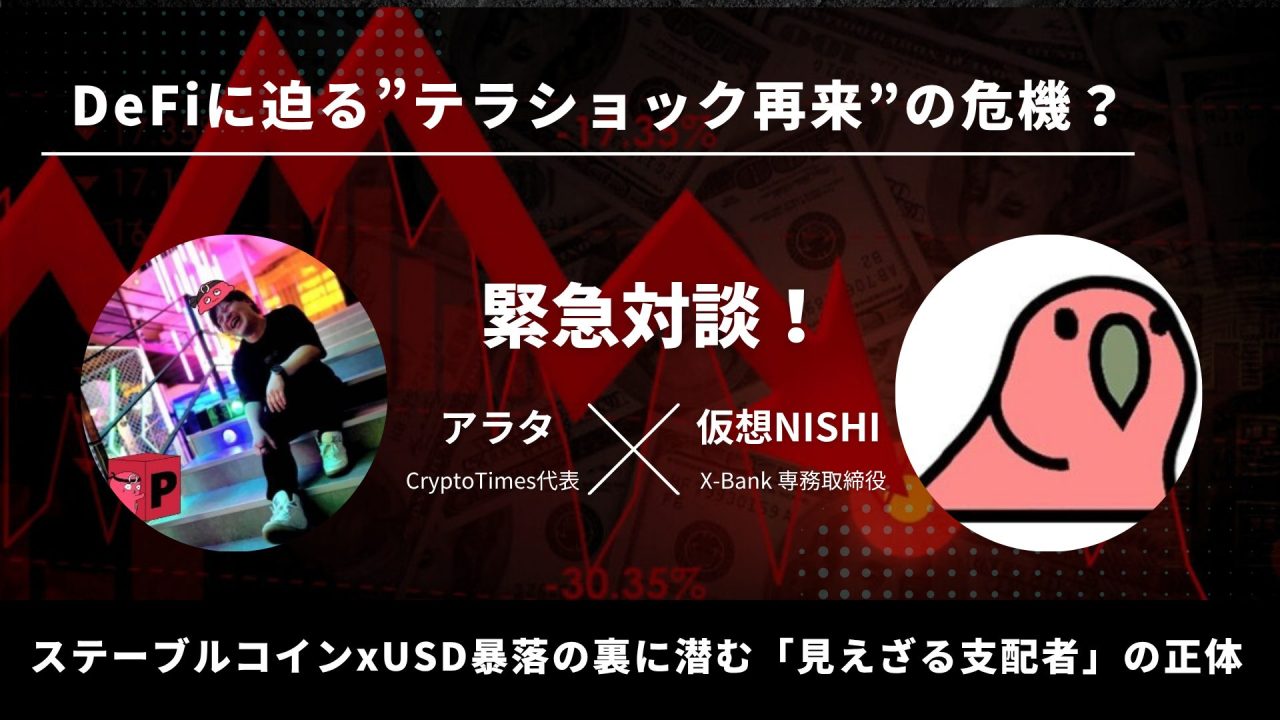
2025/11/08【緊急対談】ステーブルコインxUSD暴落の裏に潜む「見えざる支配者」の正体
4日前の11月3日に始まったDeFi(分散型金融)プロジェクト「Stream Finance」のステーブルコイン「xUSD」の崩壊は、87%という壊滅的な暴落を記録。その余波は瞬く間にDeFiエコシステム全体へと広がり、推定400億円規模の資産が凍結される事態となっています。 この緊急事態を受け、専門家の仮想NISHI氏と弊メディア運営者のアラタが緊急対談を行いました。 ステーブルコインxUSD、72時間で400億円が消えた ー Stream Finance事件が暴く、DeFiの”見えない支配者”Curatorの正体 たった3日で崩壊したステーブルコイン 仮想NISHI:今回、ステーブルコインのxUSDに異常事態が発生しています。DeFiでテラ・ルナショックの再来のような事態が起きているため、アラタさんと緊急解説を行いたいと思います。 アラタ:よろしくお願いします。 仮想NISHI:CryptoTimesの記事によると、72時間でxUSDの価値が0.16ドル、つまり約7分の1まで下落しています。この背後で何が起きているのか見ていきましょう。 Stream FinanceのステーブルコインxUSDは、わずか3日間で$1.26から$0.16へと急落。直接損失は$93M(約130億円)に達し、さらにMorpho、Euler、Siloなど複数のレンディングプロトコルで推定$285M(約400億円)相当の債務が「凍結」状態に陥った。 仮想NISHI:アラタさん、今回の問題の中心にいる「キュレーター」について説明していただけますか。 アラタ:キュレーターは、DeFiにおいて複数のプロトコルを組み合わせて高利回りの運用戦略を提供するプレイヤーです。ユーザーが個別にDeFiプロトコルを使いこなすのは難しいため、キュレーターが代わりにレゴブロックのようにプロトコルを組み合わせて、高いAPR(年利回り)を実現する戦略を提供しています。 しかし今回、このキュレーターたちがUSDTやUSDCではない、いわゆる「俺々アルゴリズムステーブルコイン」で過度なレバレッジをかけてしまったことが問題となっています。 Curator(キュレーター)は、2020年代初頭にMorpho、Eulerなどの主要レンディングプロトコルが採用したいわば「プロフェッショナル管理者」。上位5社だけでDeFi全体の推定60%の資産配分に影響を与える市場支配者となっている。 仮想NISHI:つまり、DeFiという分散型金融なのに、実際は中央集権的に資産を管理する存在が損失を出したということですね。 アラタ:その通りです。 危険な「ループ投資」の実態 仮想NISHI:これは2022年のテラ・ルナショックと似ています。テラのUSTが担保資産の価値崩壊により仮想通貨市場全体の大暴落と連鎖倒産を引き起こしました。その再来の可能性が出てきているんですね。 Stream Financeが行っていた「ループ投資」について説明します。これは株式市場でいう「二階建て投資」のようなものです。 例えば、100万円分のステーブルコインを発行し、それを担保にさらにステーブルコインを発行する。実際の担保は100万円しかないのに、市場には200万円分が存在するような状況です。これをステーブルコインの担保で繰り返していました。 アラタ氏:金を担保にドルを借りて、そのドルでまた金を買い、その金を担保にまたドルを借りる、という操作を繰り返すイメージです。 通常、2倍程度のレバレッジなら問題ないのですが、オンチェーン分析によるとStream Financeは約7.6倍のレバレッジをかけていました。自己資本は約3億円しかないのに、約20億円分を生成していたのです。 仮想NISHI:すごいですね。 オンチェーン分析で判明した実態: 実質的な自己資金:$1.9M(約2.7億円) 生成されたxUSD:$14.5M(約20億円) レバレッジ倍率:約7.6倍 この構造により見かけ上のTVL(総預かり資産)は膨張するが、わずかな市場変動で連鎖的に崩壊する極めて脆弱なシステムとなっていた。 アラタ:TVLが大きく見えるため、ユーザーは「これだけ資金が集まっているなら安全だろう」と考えてしまいます。しかし実際は約3億円でTVLをかさ増ししていただけで、xUSDや関連ステーブルコインのUSDX、deUSDのペグが外れると深刻な問題が発生します。 仮想NISHI:これは錬金術ですね。通常、ステーブルコインは100%の担保が必要なはずです。アメリカの法律でもそう定められています。 USDeへの波及リスクと市場の不安 仮想NISHI:10月にバイナンスで、Ethenaが発行するUSDeというステーブルコインがフラッシュクラッシュを起こし、一時0.6ドルくらいまで下落しました。これが金曜日のCME終了タイミング(日本時間7時頃)に発生したのですが、同様の事態が再来する可能性があります。 アラタ:私の調査では、USDeのエクスポージャーは5億ドル程度で10月11日時点では20億ドルの償還にも耐えたというデータがあります。 仮想NISHI:本当ですか。 アラタ:ただし、USDeは基本的に大丈夫だと考えています。USDeはイーサリアムやビットコインを担保にして、デルタニュートラルでヘッジを打つ仕組みなので、ステーブルコイン自体は健全です。 USDeのデルタニュートラル戦略の仕組み USDeは、xUSDのような不透明な仕組みとは異なり、数学的に健全な戦略を採用しているとされる: 担保:ETHなどの暗号資産現物を預け入れる。 ヘッジ:同額の永久先物ショートポジションを建てる。 結果:現物と先物の損益が相殺され、価格変動リスクを排除(デルタニュートラル)。 収益源:ショートポジションが受け取るファンディングレート(資金調達率)。 この戦略により、暗号資産の価格変動リスクを排除しつつ、安定した高利回り(15-30% APY)を生み出すことができる。 アラタ:でも、キュレーターがどのような運用をしているか不透明で、急激に資産が減少していることから、償還不足になる可能性が市場で噂されています。バイナンスショック以降、約40%が償還され、12億ドルから9億ドルに減少しています。 仮想NISHI:ドル建てで4分の1減少していますね。銀行の取り付け騒ぎのように、本当に償還できるのか疑心暗鬼になっている状態です。もし担保不足になればUSDeも連鎖倒産を引き起こす可能性があります。 アラタ:キュレーターが管理する5億ドルのUSDeがどう運用されているか不明で、XUSDやUSDXのデペグによる清算でUSDeが大量売却される可能性はあります。その場合、一時的にUSDeのデペグが発生する恐れがあります。 仮想NISHI:最も怖いのは噂ですね。 アラタ氏:確かにそうですね。 仮想NISHI:この対談中にビットコインが10万ドルを割り込みました。金曜日で流動性が低下するタイミング、CMEが明日7時頃に閉まり、アメリカも日本も週末になるタイミングが狙われている可能性があります。 リーマンショックの時も倒産の噂が下落を加速させ、最後に政府救済で持ち直しました。今回もステーブルコインの担保不足が明らかになれば、10月のようなフラッシュクラッシュが起きる可能性があります。 投資家への警告 アラタ:大丈夫であってほしいというのが私たちの願いですが、何とも言えない状況です。 イーサリアムだけでなく、SuiのレンディングでもUSDC不足が発生しています。SuiのTVL上位プロトコルにも波及しており、キュレーターがこれほどエクスポージャーを取っていたとすると、同様の問題が他でも発生する可能性があります。しばらくDeFiの利用は危険かもしれません。 Stream Finance事件の波及状況: Morpho:$150M+の債務凍結(複数VaultでxUSD担保ポジションが清算不能) Euler:$80M+が機能停止(Vault Kit使用市場) Silo:$40M+の流動性枯渇(孤立市場の特性が裏目) その他小規模プロトコル:$15M+ さらにUSDXやdeUSDも連鎖的にデペグし、一部のレンディングプールでは金利が800%を超える異常事態が発生。 仮想NISHI:担保割れが連鎖的に起きているということですね。 アラタ:DeFiでエクスポージャーを持っている方は警戒を強めた方がいいでしょう。何事もないことが一番ですが、リスク管理は重要です。 仮想NISHI:現在は噂が噂を呼んでいる段階で、事実は不明確ですが、ステーブルコイン不安がクリプト市場全体を覆っています。爆発するかは分かりませんが警戒が必要な状況です。 今回の緊急放送には100人以上の方に聞いていただきました。ありがとうございます。 アラタ:ありがとうございます。またよろしくお願いします。 この対談で議論されたStream FinanceとxUSDの一件は、DeFiの構造的問題を浮き彫りにしました。 問題の核心は「ハードコード・オラクル」(市場価格が$0.16まで暴落しても担保価値を$1.00と評価し続ける仕組み)やキュレーターのインセンティブ構造にあります。DeFiの「分散化の理想」と「効率性を求める現実」の間で生じた矛盾が今回の危機を引き起こしたと言えるでしょう。 ステーブルコインxUSD、72時間で400億円が消えた ー Stream Finance事件が暴く、DeFiの”見えない支配者”Curatorの正体
特集・コラム
2025/09/13誰が最もビットコインを持っているのか?個人や企業の保有状況
ビットコインの保有状況について最新のデータから個人投資家、企業、政府機関まで幅広い保有者の実態が明らかとなっています。 創設者とされるサトシ・ナカモト(個人と仮定)が依然として最大の個人保有者である一方、機関投資家や各国政府の保有量も無視できない規模に達しています。なお、ビットコインの総供給量は2100万BTCと定められていますが、秘密鍵の喪失などによってアクセスできなくなった資金が相当数存在することも忘れてはなりません。 個人投資家の保有状況:サトシ・ナカモトが圧倒的首位 オンチェーンデータ分析プラットフォームを提供するArkhamによると、ビットコインの概念を提案したサトシ・ナカモトは22,000個のアドレスにわたって1,096,000 BTCを保有しています。これらは2009年から2010年にかけて、22,000以上のブロック生成によるマイニング報酬として受け取ったものとされています。 個人としてサトシ・ナカモトに次いで2番目にビットコインを保有しているのは、中国のマイニングプールLuBianのハッカーで127,426 BTCを保有しているとされています。また、Gemini創設者のウィンクルボス兄弟は2013年当時にビットコイン総供給量の1%を購入したことを明らかにしており、保有量は約70,000 BTCとされています。 大規模なビットコイン財務戦略を初めて開始し、現在のDAT(Digital Asset Treasury)戦略の流れを生み出したStrategy社の共同創設者マイケル・セイラー氏は、17,732 BTCを個人的に所有していることを過去に明らかにしています。 関連:メタプラネットとストラテジー、新規BTCの2/3を買占め [ad_area] 仮想通貨取引所Bitgetではビットコインや多くのアルトコインに加えて、Strategy社の株式トークンなどの取引が可能です。 国内取引所では扱われていない銘柄も多く取引することが可能なため、口座を持っていない方は来たるべき強気相場に備えて是非登録をしておきましょう。 Bitgetで仮想通貨を取引する [/ad_area] 企業・ETF運用会社による大規模保有 企業セクターでは上場企業のStrategy社が638,460 BTCという圧倒的な保有量を誇ります。Solanaの財務戦略企業への出資で話題となったGalaxi Digitalは、2023年から2024年の公的提出書類において15.8億ドル分のビットコインを保有していることが報告されています(ローン・担保支払い債務は考慮されていません)。 民間企業では、2014年にハッキング被害により破産申請を行ったMt.GOXが34,689 BTC、USDTの発行元であるテザー社が78,601 BTCを保有しているといいます。 米国でビットコインETFの承認がなされた昨年以降、ETF運用企業の保有量は特に注目に値します。 様々な仮想通貨運用商品を提供するグレースケールは合計232,178 BTC、ブラックロックやフィデリティなど現物型ETFを運用する企業で合計881,700 BTCが保有されており、これらを合算すると1,113,878 BTCが資産運用会社によって管理されていることがわかります。 取引所ではCoinbaseがトップの座を占めており、オンチェーン上で974,400 BTCを保有しています。続いてBinanceが622,280 BTC、Upbitが178,000 BTCを自身や顧客資金として保有しています。 関連:暗号資産ETF延期は朗報?10月「一括承認」への布石か 政府保有と匿名アドレスの実態 政府による保有も重要な要素となっています。米国政府は198,022 BTCをBitfinexのハッキングやシルクロード事件からの回収の結果保有しています。英国政府も押収により61,245 BTCを保有しており、これはビットコインの採用を発表したエルサルバドルの6,272 BTCを大きく上回っています。 2017年にブルガリア政府が犯罪組織を摘発した後に合計213,519 BTCを押収したことはあまり知られていませんが、取締後の数ヶ月でそれらはすべてオークションにかけられたとの情報もあり、真偽は不明です。中国は巨大ポンジスキーム「プラストークン」の運営者から194,775 BTCを押収しましたが、現在も保有されているのか売却されたのかは不明とされています。 正体不明の匿名大口アドレスも存在しトップが78,317 BTC、次が68,000 BTC、その次が53,880 BTCを保有しています。これらの保有者の正体は依然として謎に包まれています。 デジタルゴールドとしての地位確立と保有分布の変化 ビットコインが今年過去最高値を更新し、デジタルゴールドとして新たな価値が世界的に見出される中でその保有量の分布は徐々に変化しています。 個人投資家から機関投資家、そして国家レベルでの保有へと多様化が進む一方で市場の成熟とともに大口保有者への集中も進行しています。この動向はビットコインが単なる投機的資産から、長期的な価値保存手段として認識されつつあることを示しているといえるでしょう。 [ad_area] 国内仮想通貨取引所「OKJ」は、毎日・毎週・隔週・毎月のいずれかのプランで1,000円~200,000円からビットコイン (BTC) の積立購入サービスを提供しています。 現在、OKJの口座開設者は1,000円分のビットコインがもらえる限定キャンペーンが実施されています。すでにほかの取引所の口座を持っている方もぜひ登録しておきましょう。 OKJで口座を開設する [/ad_area] 記事ソース:Arkham、bitcointreasuries.net [no_toc]

特集・コラム
2025/07/09イーロン・マスク氏も注目。仮想通貨で未来を取引する「予測市場」
「ビットコイン価格は年末までにいくらになるか」「次期大統領は誰になるか」など未来の出来事の結果を金融商品として取引する「予測市場」が新たな投資・情報収集のフロンティアとして、金融関係者やテクノロジー愛好家の間で注目を集め続けています。 予測市場とは将来起こる特定の出来事の結果に対して「はい(Yes)」か「いいえ(No)」、あるいは特定の結果を示す選択肢を仮想通貨を介してベット (bet) するプラットフォームです。 この市場の最大の特長は多様な情報や知識を持つ不特定多数の参加者の判断を集約する「集合知」を活用して、世論調査や専門家の分析よりも高い精度で未来を予測する可能性がある点です。 *日本での予測市場マーケットの利用は明確に許可されていないため実際の使用は推奨いたしません。 なぜ今、予測市場が熱い視線を集めるのか 市場の流動性を創出するマーケットメーカー(MM)も、この分野に熱い視線を送っています。仮想通貨市場で絶大な影響力を持つ大手マーケットメーカーWintermuteの投資部門(Wintermute Ventures)の責任者であるジョナス・クリステンセン氏は、先日開催された金融リーダーの集いで「次に注目すべき興味深い分野」として予測市場を挙げました。 マーケットメーカーの役割は常に売買の気配値を提示し、市場に参加者がいつでも取引できる流動性を提供することです。クリステンセン氏が予測市場に言及したのは単に有望な投資先だからというだけではないかもしれません。 「これまで取引不可能だったものを取引可能にする」この新しい市場は、彼らマーケットメーカーにとって自社の取引技術を活かして流動性を提供し、市場そのものを育て、収益を上げる巨大なビジネスフロンティアとなり得るからです。同氏は予測市場は株式市場などと異なり誰かが思い付いたトピックそのものが取引対象となる点に言及し、市場の可能性に言及しています。 規制を無視するか、準拠するか。2つのアプローチ 現在、予測市場には賭博に該当するかどうかの観点から規制に準拠しているか否かを軸に異なるアプローチが存在します。以下2つのプロジェクトはそれらの代表です。 ・Polymarket(ポリマーケット): ブロックチェーン技術を全面的に活用した分散型の予測市場マーケットの代表格。政治、経済、エンターテインメントなど幅広いテーマを扱い仮想通貨を使って世界中のユーザーが参加している。しかし、その自由度の高さから規制当局との間で緊張関係が生じることもあり一部の国や地域ではサービスが制限されている ・Kalshi(カルシ): 米国で初めて商品先物取引委員会(CFTC)の規制に準拠したとされる予測市場マーケット(今年5月にはCFTCは控訴を取り下げている)。主に経済指標や気候、政治イベントなど、より金融商品に近いテーマを扱っており、機関投資家なども参加しやすい設計になっている。合法性を明確に担保することで信頼性を重視するユーザー層を取り込んでいる メディアの世論調査を超える?予測市場の信頼性 Polymarketを中心に予測市場マーケットが注目されるきっかけとなったのが2024年の米国大統領選挙です。 従来のメディア各社が実施する世論調査はスポンサーの意向や政治的バイアスが影響する可能性が指摘されてきました。これに対し、Polymarketではユーザーが自身の金銭を直接賭けるため、より純粋な市場の期待が反映されるため、結果として一般的な世論調査よりも信頼性が高いとの声が上がっています。 実業家のイーロン・マスク氏もこの見解に同意しており、過去に自身のXアカウントで「賭け市場の方が世論調査より正確だ。実際にお金がかかっているからだ」と述べ、Polymarketのデータを引用しました。 Trump now leading Kamala by 3% in betting markets. More accurate than polls, as actual money is on the line. https://t.co/WrsqZ2z8pp — Elon Musk (@elonmusk) October 7, 2024 実際に前回の大統領選挙ではPolymarketが示した勝利確率の方がオールドメディアの世論調査より、選挙後の実際の数字に近かったという事例も報告されています。 まとめ 予測市場は単なる新しい金融商品の登場を意味しません。その本質は「情報のあり方」そのものを変革しようとする壮大な挑戦にあります。 Polymarketがソーシャルメディア大手「X」と結んだパートナーシップはその象徴的な一歩です。彼らが掲げるのは金銭的インセンティブによって担保された真実がスポンサーやバイアスに影響されがちな従来型メディアに取って代わる「情報の未来」です。 The next information age won’t be driven by the 20th century’s media monoliths — it’ll be driven by markets. Our partnership with @X marks a new chapter for truth on the internet. The future of news is optimized for truth, rooted in transparency, and anchored in reality. https://t.co/3HM0CJ6PPt — Polymarket (@Polymarket) June 6, 2025 この動きはイーサリアム共同創設者ヴィタリック・ブテリン氏が提唱する「インフォ・ファイナンス (= Info Finance) 」という概念とも関連付けられるでしょう。これは、予測市場を単なる賭けではなく、質の高い情報を社会から引き出すために意図的に設計された情報インフラと捉える考え方です。 もちろん、その革新性の裏側には解決すべき課題も山積しています。日本でも法整備が追いついておらず、賭博との境界線が曖昧であるなど規制上のハードルは依然として高いのが現状です。 金融、情報、テクノロジーが融合したこの新たなフロンティアが社会にどのような変革をもたらすのか。その可能性と乗り越えるべき課題を含め今後の動向から目が離せません。 記事ソース:Talking Tokens Podcast 免責事項 ・本記事は情報提供のために作成されたものであり、暗号資産や証券その他の金融商品の売買や引受けを勧誘する目的で使用されたり、あるいはそうした取引の勧誘とみなされたり、証券その他の金融商品に関する助言や推奨を構成したりすべきものではありません。 ・本記事に掲載された情報や意見は、当社が信頼できると判断した情報源から入手しておりますが、その正確性、完全性、目的適合性、最新性、真実性等を保証するものではありません。 ・本記事上に掲載又は記載された一切の情報に起因し又は関連して生じた損害又は損失について、当社、筆者、その他の全ての関係者は一切の責任を負いません。暗号資産にはハッキングやその他リスクが伴いますので、ご自身で十分な調査を行った上でのご利用を推奨します。(その他の免責事項はこちら) [no_toc]
特集・コラム
2025/06/25ビットコイン現物ETFへ1日で約800億円越えの流入、巨額資金流入は止まらないのか?地政学からFRBまで、市場を動かす全要因を徹底解剖
2025年6月24日、市場に静かな衝撃が走りました。現物型ビットコイン(BTC)ETFに一日で約5億8900万ドル、イーサリアム(ETH)ETFにも約7123万ドルという、記録的な規模の資金が流入しました(CoinGlass調べ)。一部の熱狂的な支持者を除き、多くの市場観測筋が固唾をのんで見守るこの現象は、単なる偶然や短期的な反発ではありません。これは、4つの巨大な歯車が完璧なタイミングで噛み合ったことで発生した、まさしく「パーフェクトストーム」です。その歯車とは、①世界経済の追い風、②機関投資家の本格参入、③規制という名の雪解け、そして④市場内部の健全なダイナミクスです。 本稿では、この歴史的な資金流入の背景にある4つの巨大な力を一つ一つ分解し、なぜ今、デジタル資産が金融史における重要な転換点を迎えているのか、その深層を徹底的に解き明かします。これは、もはや周縁の投機的資産の物語ではありません。世界金融のメインストリームへと合流を果たす、新時代の幕開けの記録です。 [ad_area] 国内仮想通貨取引所「OKJ」は、毎日・毎週・隔週・毎月のいずれかのプランで1,000円~200,000円からビットコイン (BTC) の積立購入サービスを提供しています。時間がなく忙しいあなたでもビットコインの投資が行えます。 現在、OKJの口座開設者は1,000円分のビットコインがもらえる限定キャンペーンが実施中。すでにほかの取引所の口座を持っている方もぜひ登録しておきましょう。 OKJで口座を開設する [/ad_area] 世界が「リスクオン」に傾いた日 ― マクロ経済という巨大な追い風 全ての物語には始まりがあります。今回の暗号資産市場への資金大移動の直接的な引き金は、金融市場全体を覆っていた重苦しい空気が一変したことでした。世界経済という巨大な船が、その舵を「リスク回避」から「リスク選好(リスクオン)」へと切ったのです。 引き金となった「停戦報道」という福音 6月23日のイラン・イスラエル停戦報道後(日本時間では6月24日朝6時半ころ)、暗号資産市場では大幅な価格上昇が観測されました。原油供給への懸念が和らぎ、地政学的リスクという最大の霧が晴れたことで、投資家心理は改善しました。これまで資金の避難先となっていた金(ゴールド)のような安全資産から、株式や暗号資産といった、より高いリターンを狙えるリスク資産へと、資金移動が始まりました。 ビットコインは106,000ドル台に回復し、ETHも急騰を見せました。SOL、XRPといった主要なアルトコインも軒並み上昇し、この動きが一部の資産に限ったものではなく、市場全体の地殻変動であることを示しました。ただし、この価格変動が停戦報道単独の影響なのか、他の要因との複合的な結果なのかは慎重な分析が必要です。 FRBの「金融緩和期待」という燃料と現実のギャップ 地政学リスクの後退という追い風に加え、市場には米連邦準備制度理事会(FRB)による「金融緩和」への期待が存在していました。 BREAKING: In a stunning moment, Fed Chair Jerome Powell just said that the Fed would have cut interest rates if not for Trump’s tariffs. Trump’s tariffs are to blame for rising costs. pic.twitter.com/pVcA8v8vmc — Democratic Wins Media (@DemocraticWins) June 24, 2025 市場は、FRBが2025年後半に利下げを実施する可能性を織り込んでいますが、実際の政策当局者の見解はより慎重です。パウエル議長は6月24日の議会証言で「急ぐ必要はない」と慎重姿勢を示し、関税による物価上昇を警戒して「特定の会合について指摘したくない」として利下げ時期を明言していません。この期待の背景には、5月の消費者物価指数(CPI)が前年同月比2.4%の上昇に留まり、年初からの鎮静化傾向を維持していることがあります。労働市場も過熱感を失い、緩やかな減速を見せています。 ただし、FRBは関税による物価上昇を警戒しており、パウエル議長は「夏にかけて、6月と7月の数字に表れ始めるはずです」として関税の影響を慎重に見極める姿勢を示しています。証言後、金融市場では7月利下げ観測が後退し、9月開始・年内2回の利下げという観測が高まりました。 利下げが実施されれば、ビットコインのような「利息を生まない資産」にとって、根本的な追い風となります。国債などの安全資産の魅力が相対的に低下することで、ビットコインを保有する機会費用が減少し、その価値貯蔵手段としての魅力が高まるからです。 ビットコイン、マクロ資産への「覚醒」 歴史的に見れば、暗号資産は独自の生態系を持つ「孤島」でした。しかし、現物ETFの登場がすべてを変えました。ブラックロックやフィデリティといった機関投資家の巨人が、この島と大陸(伝統金融)の間に巨大な橋を架けたのです。 彼らは世界経済の潮の流れを読み、資産配分を決定します。今回の資金流入は、地政学(停戦)が金融政策(利下げ期待)を動かし、それが機関投資家の戦略を後押しし、規制された金融商品(ETF)を通じて暗号資産市場へ流れ込む、という連鎖反応の一例となりました。ビットコインはもはや単なるテクノロジー資産ではなく、世界経済の動向と連動するグローバルなマクロ資産としての性格を強めているのです。 機関投資家の本気 ― ETFが破壊した「見えざる壁」 マクロ経済が追い風を吹かせたとしても、その風を受けて進む帆船がなければ意味がありません。ETFという金融商品は、機関投資家という巨大な船団が、暗号資産という大海原へ乗り出すことを可能にした革命的な発明でした。 黒船来航:IBITとFBTCの市場席巻 6月24日の資金流入の内訳を見ると、その力が一部にどれほど集中しているかが分かります。ブラックロックのiShares Bitcoin Trust(IBIT)には一日で4億3630万ドル、フィデリティのWise Origin Bitcoin Fund(FBTC)にも8520万ドルが流入し、この2つの「黒船」が新規資金の大半を飲み込みました(CoinGlass調べ)。 [caption id="attachment_138393" align="aligncenter" width="838"] Spot BTC ETFのNetflowデータ - CoinGlassより[/caption] この圧倒的な力の背景にあるのが、彼らのブランド力と、市場の常識を覆した「手数料戦争」です。ブラックロックやフィデリティは、0.19%から0.30%という、他の金融商品と遜色のない低コストを実現しました。これは、1.5%という旧来の高額な手数料で長年市場を独占してきたグレイスケールのBitcoin Trust(GBTC)にとって致命的となり、投資家がより安価な代替手段へと乗り換える大規模な資金流出を引き起こしました。ETFは、カストディ(資産管理)や規制遵守といった、機関投資家が抱えていた「見えざる壁」を破壊し、彼らが安心して巨額の資金を投下できるハイウェイを整備したのです。 主要ビットコインETFの経費率比較 ファンド名 (ティッカー) 発行体 経費率 iShares Bitcoin Trust (IBIT) ブラックロック 0.25% (一部手数料免除あり) Fidelity Wise Origin Bitcoin Fund (FBTC) フィデリティ 0.25% (一部手数料免除あり) Grayscale Bitcoin Trust (GBTC) グレイスケール 1.50% ビットコイン:「デジタルゴールド」という共通言語の誕生 機関投資家は、なぜビットコインを買うのでしょうか。2025年現在、その答えはほぼ一つに収斂しています。それは、ビットコインが「デジタルゴールド」、すなわち国家の管理を受けない、優れた価値の保存手段であるという認識です。 このナラティブを強力に推進したのが、世界最大の資産運用会社ブラックロックのCEO、ラリー・フィンク氏その人です。彼はビットコインを「政府の野放図な財政によって引き起こされる通貨価値の低下に対するヘッジ」であり、世界金融システムへの「恐怖のバロメーター」だと公言しました。金融界の頂点に立つ人物のこの言葉は、他の機関投資家にとって何よりの「お墨付き」となりました。 さらに、米国政府が「戦略的ビットコイン準備金」を創設し、政府保有分の売却を禁じたことは、このナラティブを国家レベルで追認するに等しい出来事でした。企業が財務資産としてビットコインを保有する動きも広がり、ビットコインは今や、機関投資家が理解できる「共通言語」を手に入れたのです。 [ad_area] 国内仮想通貨取引所「OKJ」は、毎日・毎週・隔週・毎月のいずれかのプランで1,000円~200,000円からビットコイン (BTC) の積立購入サービスを提供しています。時間がなく忙しいあなたでもビットコインの投資が行えます。 現在、OKJの口座開設者は1,000円分のビットコインがもらえる限定キャンペーンが実施中。すでにほかの取引所の口座を持っている方もぜひ登録しておきましょう。 OKJで口座を開設する [/ad_area] ワシントンの雪解け ― 規制という「最大の鎖」からの解放 どんなに優れた金融商品が登場し、マクロ環境が良好でも、政府が「NO」と言えばすべては終わります。機関投資家が暗号資産への参入をためらってきた最大の理由は、この「規制の不確実性」という名の分厚い氷の壁でした。しかし2025年、その氷が劇的に溶け始めました。 画期的な「GENIUS法」の成立 2025年6月、米国上院は超党派の圧倒的支持(68対30)を得て、GENIUS法(決済用ステーブルコインに関する包括的連邦法)を可決しました。これは、暗号資産の歴史における画期的な出来事です。 この法律は、ステーブルコイン発行者に対し、現金同等物による100%の準備金維持と月次の監査を義務付けるもので、暗号資産経済の根幹を支える「配管」の安全性を国家が保証することを意味します。これにより、かつて懸念されたステーブルコインの取り付け騒ぎというシステミックリスクは大幅に低減され、機関投資家が安心してエコシステムに参加するための土台が築かれました。 関連記事 : 米GENIUS法案、Web3投資の勝者と敗者は?ステーブルコイン規制の光と影 - Crypto Times 「執行から実現へ」SECの政策転換 規制の追い風はこれだけではありません。トランプ政権下で、SEC(証券取引委員会)もまた、訴訟を乱発する「執行による規制」から、明確なルールを策定し、イノベーションを後押しする「実現のための規制」へと、その姿勢を大きく転換させました。 現在、SECはSOLやXRPといった新たなアルトコインETFの承認に向けて、発行体と前向きな協議を進めています。さらに、プロトコルレベルでのステーキングは証券に該当しないとの見解を示し、将来の金融商品への道を開きました。この一連の動きは、機関投資家を縛り付けていた「規制」という最大の鎖を解き放つものでした。 この雪解けは、暗号資産業界の巧みなロビー活動が、より友好的な政権を誕生させ、その政権が規制を明確化し、それが機関投資家の参入を呼び込み、市場の成功がさらなる政治的支持を生む、という強力な「正当性のフィードバックループ」が回り始めた証拠なのです。 市場内部の"体温" ― データが語る投資家の本音 追い風が吹き、規制の壁が取り払われた今、市場の内部、すなわち投資家の「本音」はどうなっているのでしょうか。オンチェーンデータとデリバティブ市場を分析することで、現在の市場の"体温"を測ることができます。 オンチェーン分析:静かなる「大蓄積時代」の到来 ブロックチェーン上のデータを分析すると、興味深い事実が浮かび上がります。最近の価格下落局面においても、市場ではパニック売りは起きておらず、むしろ静かなる「大蓄積」が進んでいる可能性があります。長期保有を目的とする「確信を持った買い手」が、短期的な価格変動に狼狽した売り手から、着実にBTCを買い集めている様子がデータから示唆されます。 [caption id="attachment_138394" align="aligncenter" width="1024"] 取引所に保管されているBTCのリザーブ - CryptoQuantより[/caption] 取引所でいつでも売れる状態にあるBTCの量(取引所準備金)は減少傾向にあるとされています。これは、購入されたBTCが長期保管用のウォレットへと移動していることを意味し、市場の流動的な供給が逼迫している可能性を示唆します。この供給の引き締まりが、ETFからの継続的な買い需要と相まって、価格上昇圧力となっている可能性があります。 さらにデータを深掘りすると、市場が二極化している様子が見えてきます。Coinbaseなど、米国の機関投資家が主戦場とする取引所では、強い買い圧力が観測されています。一方で、個人投資家が中心の取引所では、必ずしも同じ動きは見られません。 市場データからは、機関投資家を中心としたビットコインへの継続的な資金流入が観測されています。一方で、個人投資家の動向については、過去のサイクルパターンから「アルトコインシーズン」への期待があるとの見方もありますが、具体的なポートフォリオ配分データによる検証が必要です。このことから、6月24日に観測された記録的なETFへの資金流入は、市場全体の総意というよりは、主に機関投資家の巨大なセンチメントと戦略が顕在化したものであると考えられます。 結論:新時代の幕開け ― 今後注目すべき4つの触媒と4つのリスク 本稿で見てきたように、2025年6月24日の大規模な資金流入は、マクロ経済、機関投資家の論理、規制緩和、市場内部の力学という4つの歯車が完璧に噛み合った「パーフェクトストーム」でした。そして、それは政治と金融が相互に作用し合う「正当性のフィードバックループ」が、今まさに暗号資産市場で回り始めたことを示しています。 デジタル資産は新たな発展段階に入ったと考えられますが、市場の成熟度については今後の動向を注意深く観察する必要があります。最後に、この新時代の航海を続ける上で、私たちが注目すべき「追い風(触媒)」と「嵐(リスク)」を整理しておきたいと思います。 注目すべき4つの触媒 FRBの利下げ実施: 9月以降、関税の影響を見極めた上で利下げが実行されるでしょうか。パウエル議長は慎重姿勢を示していますが、インフレ圧力が抑制されれば早期の利下げもあり得るとしています。 経済データ: 今後のインフレ(PCE)や雇用統計が、金融緩和を後押しするでしょうか。特に関税の影響が夏季のデータにどう現れるかが焦点です。 追加ETFの承認: ソラナやXRPなどの現物ETFが承認され、市場がさらに拡大するでしょうか。 年金基金の参入: 米国の巨大年金基金が、ポートフォリオへの暗号資産組み入れを公式に発表するでしょうか。 警戒すべき4つのリスク マクロ経済の反転: 予期せぬインフレ再燃や地政学リスクの再燃が、リスクオンムードを急変させる可能性があります。特に関税による物価上昇が予想以上に進行するリスクがあります。 規制の逆行: 政治的な風向きの変化により、再び厳しい規制が導入されるリスクがあります。 市場インフラの脆弱性: Coinbaseのような特定のカストディアンへの過度な依存がもたらす集中リスクがあります。 ステーブルコインリスク: 法律が整備されたとはいえ、巨大発行体の破綻が金融システムに与える未知数の影響があります。 暗号資産の歴史は、新たな章に突入した可能性があります。その未来は、これらの触媒とリスクが織りなす複雑なタペストリーとなるでしょう。市場参加者は、熱狂に流されることなく、冷静な分析の目を持ち続けることが、これまで以上に求められています。 [ad_area] 国内仮想通貨取引所「OKJ」は、毎日・毎週・隔週・毎月のいずれかのプランで1,000円~200,000円からビットコイン (BTC) の積立購入サービスを提供しています。時間がなく忙しいあなたでもビットコインの投資が行えます。 現在、OKJの口座開設者は1,000円分のビットコインがもらえる限定キャンペーンが実施中。すでにほかの取引所の口座を持っている方もぜひ登録しておきましょう。 OKJで口座を開設する [/ad_area] 記事出典/引用文献 Bitcoin reclaims $106K as crypto market soars — Ethereum, Solana, XRP, and Cardano rally big on Middle East ceasefire hopes: Is this the start of the next crypto bull run? - The Economic Times https://m.economictimes.com/news/international/us/bitcoin-reclaims-106k-as-crypto-market-soars-ethereum-solana-xrp-and-cardano-rally-big-on-middle-east-ceasefire-hopes-is-this-the-start-of-the-next-crypto-bull-run/articleshow/122048816.cms Fed's Interest Rate Decision: June 18, 2025 - dshort - Advisor Perspectives https://www.advisorperspectives.com/dshort/updates/2025/06/18/feds-interest-rate-decision-june-18-2025 United States Consumer Price Index (CPI) YoY - Investing.com https://www.investing.com/economic-calendar/cpi-733 June 2025 Jobs Report Recap - Engage2Excel Blog https://blog.engage2excel.com/june-2025-jobs-report-recap Ultrabrokers Expert Reports Bitcoin ETFs Record Eight Days of Inflows Despite Middle East Conflict - StreetInsider https://www.streetinsider.com/Evertise+Financial/Ultrabrokers+Expert+Reports+Bitcoin+ETFs+Record+Eight+Days+of+Inflows+Despite+Middle+East+Conflict/24969904.html BlackRock's Bitcoin ETF Just Dethroned S&P 500 Giant: What's Going On? - TradingView https://www.tradingview.com/news/u_today:015525514094b:0-blackrock-s-bitcoin-etf-just-dethroned-s-p-500-giant-what-s-going-on/ Bitcoin vs. Ethereum: The Great Divide of 2025 – Institutionalization, Regulation, and Liquidity at Odds - Pepperstone https://pepperstone.com/en-au/analysis/bitcoin-vs-ethereum-the-great-divide-of-2025-institutionalization-regulation-and-liquidity-at-odds/ 1 Surprising Reason to Buy Bitcoin, According to BlackRock CEO Larry Fink - Nasdaq https://www.nasdaq.com/articles/1-surprising-reason-buy-bitcoin-according-blackrock-ceo-larry-fink Ethereum dumped hard in Q1 2025, underperforms Bitcoin and Solana: Here's why - FXStreet https://www.fxstreet.com/cryptocurrencies/news/ethereum-dumped-hard-in-q1-2025-underperforms-bitcoin-and-solana-heres-why-202505022320 A Quick Look at the New U.S. Post-Election Cryptocurrency Policy Regime - Econ One https://econone.com/resources/blogs/us-post-election-cryptocurrency-policy-regime/ Crypto Policy Outlook in the Trump Administration - BHFS https://www.bhfs.com/insights/alerts-articles/2024/crypto-policy-outlook-in-the-trump-administration US Senate passes stablecoin bill in milestone victory for crypto sector - Al Jazeera https://www.aljazeera.com/economy/2025/6/17/us-senate-passes-stablecoin-bill-in-milestone-victory-for-crypto-sector DOL Abandons ESG Rule in Investment Duties Regulation; Rescinds Cryptocurrency Guidance - Goodwin Law https://www.goodwinlaw.com/en/insights/publications/2025/06/alerts-practices-erisalit-dol-abandons-esg-rule On-Chain Analysis Explained: How to Read Blockchain Like a Pro - CCN.com https://www.ccn.com/education/understanding-on-chain-analysis-a-comprehensive-guide/ Bitcoin Derivatives Market Sees 26% Decline in Open Interest Amid Geopolitical Tensions - AInvest https://www.ainvest.com/news/bitcoin-derivatives-market-sees-26-decline-open-interest-geopolitical-tensions-2506/ 免責事項 ・本記事は情報提供のために作成されたものであり、暗号資産や証券その他の金融商品の売買や引受けを勧誘する目的で使用されたり、あるいはそうした取引の勧誘とみなされたり、証券その他の金融商品に関する助言や推奨を構成したりすべきものではありません。 ・本記事に掲載された情報や意見は、当社が信頼できると判断した情報源から入手しておりますが、その正確性、完全性、目的適合性、最新性、真実性等を保証するものではありません。 ・本記事上に掲載又は記載された一切の情報に起因し又は関連して生じた損害又は損失について、当社、筆者、その他の全ての関係者は一切の責任を負いません。暗号資産にはハッキングやその他リスクが伴いますので、ご自身で十分な調査を行った上でのご利用を推奨します。

特集・コラム
2025/06/24アメリカのイラン核施設攻撃で激変する暗号通貨市場:ビットコイン20万ドル予測の真実と投資家が知るべき根拠
2025年6月21日、米国がイランの核施設を攻撃。この歴史的な軍事行動により、ビットコインは一時10万ドルを割り込み、暗号通貨市場に激震が走りました。しかし驚くべきことに、複数の専門家は「これが20万ドルへの序章」だと主張しています。 「地政学的リスクで暴落したのに、なぜ強気予測?」「原油価格高騰とインフレ圧力の中で、本当にビットコインは上昇するのか?」 本稿では、最新の地政学的緊張下における暗号通貨市場の真実を徹底分析。機関投資家の動向、原油価格とインフレの影響、そして投資家が今すぐ実践すべき3つの戦略を明らかにします。 [ad_area] 国内仮想通貨取引所「OKJ」は、毎日・毎週・隔週・毎月のいずれかのプランで1,000円~200,000円からビットコイン (BTC) の積立購入サービスを提供しています。時間がなく忙しいあなたでもビットコインの投資が行えます。 現在、OKJの口座開設者は1,000円分のビットコインがもらえる限定キャンペーンが実施中。すでにほかの取引所の口座を持っている方もぜひ登録しておきましょう。 OKJで口座を開設する [/ad_area] 米国によるイラン核施設攻撃:市場を揺るがした「6月21日の衝撃」 攻撃の全容と市場への即座の影響 2025年6月21日土曜日の早朝、米国はイランの3つの核施設(Fordo、Natanz、Esfahan)に対して大規模な空爆を実施しました。トランプ大統領はホワイトハウスから「イランの核プログラムを完全に破壊した」と宣言。この作戦「Operation Midnight Hammer」には、B-2爆撃機7機を含む125機以上の航空機が参加し、バンカーバスター爆弾が使用されました。 この攻撃は、6月13日から始まったイスラエル・イラン紛争のエスカレーションの頂点でした。イスラエルによる「Rising Lion」作戦で始まった紛争は、わずか1週間で米国の直接介入という最悪のシナリオに発展したのです。 ビットコイン10万ドル割れの真相 地政学的緊張の高まりを受け、ビットコインは6月22日に99,975ドルまで下落し、5月8日以来初めて10万ドルの大台を割り込みました。この下落は以下の要因が複合的に作用した結果です: リスクオフムードの拡大:S&P500は1.2%下落、Fear & Greed Indexは43(恐怖)を示す 暗号通貨クジラの売却:大口投資家による10,500 BTCの取引所への流入 レバレッジポジションの清算:24時間で4億5000万ドルの強制ロスカット [caption id="attachment_138260" align="aligncenter" width="529"] BTCのチャートとリスクオフムードへの推移[/caption] しかし注目すべきは、この下落が「パニック売り」ではなく「秩序だった調整」だったことです。200日移動平均線(95,567ドル)は強固なサポートとして機能し、機関投資家の逃避は発生しませんでした。 原油価格高騰とインフレ圧力:暗号通貨市場への複雑な影響 ホルムズ海峡封鎖リスクと110ドル予測 攻撃後、原油価格は急騰。WTI原油は10.1%上昇し、Brent原油は77ドル/バレルに達しました。Goldman Sachsは最悪のシナリオとして、イランがホルムズ海峡を封鎖した場合、Brent原油が110ドル/バレル(30%増)まで上昇する可能性を指摘しています。 現在、原油の価格は70ドルを割っている状況ですが、今後の状況次第では、価格がまた上昇する可能性も残っています。 [caption id="attachment_138261" align="aligncenter" width="501"] 原油の価格[/caption] ホルムズ海峡は世界の石油消費量の約20%が通過する戦略的要衝。その封鎖は、2022年7月以来の原油価格高騰をもたらし、グローバル経済に深刻な影響を与える可能性があります。 原油価格の上昇は直接的にインフレ圧力を高めます。FRBの研究によれば: 原油価格10ドル上昇 → CPIインフレ20ベーシスポイント上昇 4月からの20ドル上昇 → 約40ベーシスポイントのCPI押し上げ これにより、FRBが予定していた2025年の2回の利下げが困難になる可能性があるとしています。しかし、皮肉にもこの状況が暗号通貨市場にとってプラスに働く可能性があるのです。 理由として、スタグフレーション(景気停滞とインフレの同時発生)リスクが高まる中、ビットコインは「デジタルゴールド」として、インフレヘッジ資産としての需要が高まる可能性があるからです。 [ad_area] 国内仮想通貨取引所「OKJ」は、毎日・毎週・隔週・毎月のいずれかのプランで1,000円~200,000円からビットコイン (BTC) の積立購入サービスを提供しています。時間がなく忙しいあなたでもビットコインの投資が行えます。 現在、OKJの口座開設者は1,000円分のビットコインがもらえる限定キャンペーンが実施中。すでにほかの取引所の口座を持っている方もぜひ登録しておきましょう。 OKJで口座を開設する [/ad_area] 専門家が予測する「ビットコイン20万ドル」の根拠 3つのデータモデルが示す強気シナリオ 地政学的混乱にもかかわらず、複数の専門家がビットコインの強気予測を維持しています。特に著名な暗号通貨アナリストは、2025年末までに20万ドル以上への上昇を予測し、以下の3つのモデルを根拠として挙げています: 歴史的サイクルリターン分析 2022年の底値15,500ドルから10-15倍のリターン 目標価格:140,000-210,000ドル 前回高値からの倍率分析 2021年の高値69,000ドルから2-3倍の成長パターン 目標価格:140,000-210,000ドル Power Law Model 対数成長を用いたビットコイン価格軌道 目標価格:約210,000ドル 最終的な急騰局面:2025年10-12月 機関投資家の「逆張り」戦略 [caption id="attachment_138262" align="aligncenter" width="687"] BTC ETFのInflowは今もプラス[/caption] また、驚くべきことに、地政学的緊張の中でも機関投資家の資金流入は止まっていません: 10週連続の流入:暗号通貨ファンドへ12.4億ドルの資金流入 年初来150億ドル超:ビットコインETFへの記録的な投資 ETF需要の継続:BlackRockのETFは4億1200万ドルの流入でピーク CoinSharesのETF流入に関するデータはこちら 複数の市場専門家は、「地政学的ニュースよりもマクロ経済指標の方が価格に大きな影響を与える」と分析。実際、ビットコインは歴史的に地政学的混乱時に上昇傾向を示してきました(2020年の米国・イラン緊張、2022年のロシア・ウクライナ侵攻時)。 まとめ:混沌の中にこそチャンスあり 2025年6月の米国によるイラン核施設攻撃は、確かに短期的な市場の混乱をもたらしました。しかし、歴史が示すように、地政学的危機は往々にしてビットコインにとって強気相場の触媒となってきました。 重要なのは、以下の3つのポイントを理解することです: 構造的な強さは維持:機関投資家の資金流入は継続し、ETF需要は衰えていない インフレヘッジとしての役割:原油価格高騰によるインフレ圧力は、逆にビットコインの魅力を高める 歴史的パターンの再現:半減期後の強気相場パターンは依然として有効 投資家として重要なのは、恐怖に支配されることなく、しかし楽観に流されることもなく、冷静に市場を分析し、規律ある投資戦略を実行することです。 地政学的リスクと原油価格上昇という逆風の中でも、ビットコイン20万ドルへの道筋は見えています。ただし、その道のりは決して平坦ではありません。賢明な投資家は、この混沌を機会と捉え、適切なリスク管理のもとで行動する者だけが、真の利益を手にすることができるでしょう。 [ad_area] 国内仮想通貨取引所「OKJ」は、毎日・毎週・隔週・毎月のいずれかのプランで1,000円~200,000円からビットコイン (BTC) の積立購入サービスを提供しています。時間がなく忙しいあなたでもビットコインの投資が行えます。 現在、OKJの口座開設者は1,000円分のビットコインがもらえる限定キャンペーンが実施中。すでにほかの取引所の口座を持っている方もぜひ登録しておきましょう。 OKJで口座を開設する [/ad_area] 免責事項 ・本記事は情報提供のために作成されたものであり、暗号資産や証券その他の金融商品の売買や引受けを勧誘する目的で使用されたり、あるいはそうした取引の勧誘とみなされたり、証券その他の金融商品に関する助言や推奨を構成したりすべきものではありません。 ・本記事に掲載された情報や意見は、当社が信頼できると判断した情報源から入手しておりますが、その正確性、完全性、目的適合性、最新性、真実性等を保証するものではありません。 ・本記事上に掲載又は記載された一切の情報に起因し又は関連して生じた損害又は損失について、当社、筆者、その他の全ての関係者は一切の責任を負いません。暗号資産にはハッキングやその他リスクが伴いますので、ご自身で十分な調査を行った上でのご利用を推奨します。

特集・コラム
2025/06/23仮想通貨プロジェクトへの投資、3割以上がAI領域|勝者の条件とは
仮想通貨市場では数え切れないほどの新しいトークンが生まれては消えていく光景が日常となっています。多くのアルトコインプロジェクトが期待されたほどの成果を上げられずにいるのが現実です。 この状況のなかで投資家は「何が本当に価値のあるプロジェクトなのか」という根本的な問いを改めて考える必要があります。 見せかけの成功指標に惑わされない これまで多くの投資家が頼りにしてきた判断基準の多くが実は価値創造とは直接関係がないことが昨今の市場の動きが示しています。 有名な投資ファンドが出資しているからといってそのトークンが成功するとは限りません。優れた技術を持つプロジェクトであってもその成果がトークン保有者の利益に繋がる保証もありません。 プロジェクトが順調に収益を上げていてもその利益がトークンの買い戻しやバーンといった形で還元されなければ、投資家にとっての価値は生まれません。取引所への上場もかつてほどの価格押し上げ効果は期待できなくなっています。 重要なのはプロジェクトが作る「プロダクト(製品)」と私たちが投資する「トークン」がどのような仕組みで価値を共有しているかを理解することといえます。 新たな成長の源泉:AIとデジタル経済 では、これからの市場成長はどこから生まれるのでしょうか。 AI技術の急速な発展により、私たちの経済活動そのものが大きく変化しようとしています。AIエージェントが人間に代わって様々な取引や決済を行う未来が現実味を帯びる中でその経済活動を支える新しい金融インフラやプロダクトへの需要が高まっています。 この変化はすでに企業に対する投資行動にも表れています。ある調査によると、2025年第1四半期のAIスタートアップへの投資額は全体の58%を獲得し、前年同期比の28%から大幅な増加となっています。 また、直近1ヶ月のWeb3プロジェクトの資金調達事例の数を見ると、AI関連のプロジェクトが全体の3割以上を占めるようになっており、市場の関心がこの分野に集中していることが分かります。 #CTAnalysis より「2025年6月1日-6月7日 資金調達を実施したPJ 8選」を公開しました。https://t.co/f0kRKR6wkF 本レポートは、6月1日〜6月7の資金調達を特集した内容です。 今週は取引所やAI関係の資金調達が目立ちました。 pic.twitter.com/dabqdMv32u — CT Analysis | Web3.0 Research Platform (@ct_analysis_) June 12, 2025 同時にCircleの上場と株価の高騰、Amazon、Walmart、Shopifyといった大手企業によるステーブルコイン導入の検討など、デジタル通貨が日常的な商取引の一部として受け入れられつつあります。これは単なる技術的な実験ではなく実用性に基づいた本格的な採用の動きと言えるでしょう。 関連:ビットコインを超える可能性?著名投資家が次に賭ける「AI銘柄」とは 成功するプロジェクトの新しい条件 この新しい環境で成功するプロジェクトには従来とは異なる特徴が求められています。 最も重要なのは創業者とチームが製品開発だけでなく、トークンの価値向上についても明確な戦略を持っていることです。技術的な革新を追求しながらもそれがどのようにトークン保有者の利益に繋がるのかを具体的に説明できるチームが求められています。 また、優れた技術を持つだけでは不十分です。その価値を世界中の投資家に効果的に伝えるマーケティング能力、そしてトークン発行後も継続的にコミュニティとの関係を築いていく姿勢がプロジェクトの長期的な成功を左右するといえるでしょう。 関連:Cookie DAOは次なるKaito AIか?InfoFi市場の新星 投資家として大切にすべき視点 市場の短期的な動きや派手なニュースに振り回されるのではなく、長期的な構造変化に注目することが重要です。 AI技術の進歩やデジタル通貨の普及、また、昨今では機関投資家の本格参入といった大きな流れは今後数年間にわたって市場の成長を支える基盤となるでしょう。 成功する投資家はこうした変化の本質を理解し、一時的な市場の混乱に惑わされることなく将来への信念を持ち続けています。技術革新の初期段階では必ず懐疑的な声が上がりますが、その中で真の価値を見抜く眼を養うことが次の大きな波を捉えるための鍵となります。 信頼できる情報源から継続的に学び、歴史の教訓を活かしながら、変化の激しいこの市場で長期的な成功を目指す姿勢が求められます。 記事ソース:Substack [no_toc]

特集・コラム
2025/06/21Evo Fundによる資金調達の仕組みとは:BTCで動くメタプラネット株価を事例に、希薄化リスクを考える
2024年から2025年にかけて、メタプラネット社の株価急騰をきっかけに投資ファンド「Evo Fund」の名が市場を賑わせています。彼らが仕掛ける「BTCドーピングによる資金調達スキームと株価上昇」は時に株価を劇的に押し上げる起爆剤となり、多くの投資家に「一攫千金の夢」を見せます。 関連記事 : メタプラネットは”信念”を貫けるか?『BTCドーピング』により株価が崩壊する”3つの試練”と運命の分岐点 - Crypto Times しかし、その夢の裏側には投資家が知るべき三重のリスクが存在します。それは「①持分希薄化」という未来の売り圧力、「②空売りヘッジ」という現在の売り圧力、そしてそれらが引き起こす最悪のシナリオ「③デス・スパイラル」です。 本稿ではEvo Fundが用いる手法の全体像から、実際に企業が破綻に至った過去の事例まで、投資家が自らの資産を守るために知るべき全ての情報を網羅的かつ詳細に解説します。Evo Fundに関してをまとめた記事は下記の記事も参考にしてください。 関連記事 : メタプラネット株価80倍の“仕掛け人” EVO FUNDとは何者か?その投資哲学と「BTCドーピング」の錬金術 - Crypto Times [ad_area] 国内仮想通貨取引所「OKJ」は、毎日・毎週・隔週・毎月のいずれかのプランで1,000円~200,000円からビットコイン (BTC) の積立購入サービスを提供しています。時間がなく忙しいあなたでもビットコインの投資が行えます。 現在、OKJの口座開設者は1,000円分のビットコインがもらえる限定キャンペーンが実施中。すでにほかの取引所の口座を持っている方もぜひ登録しておきましょう。 OKJで口座を開設する [/ad_area] 「BTCドーピング」が生み出す「二重の売り圧力」という罠 Evo Fundが関与する銘柄に投資するということは、常に「二重の売り圧力」に晒され続けることを意味します。これは、彼らの資金調達スキームの構造そのものに起因する、避けられない現実です。 罠① 将来の売り圧力 ― あなたの株の価値を薄める「持分希薄化」 Evo Fundの資金調達手法の核であるMSワラント(行使価額修正条項付新株予約権)は、将来、大量の新株が市場に放出されることを運命づけられています。 なぜ企業はこのようなリスクのある手法を受け入れるのでしょうか。その多くは銀行融資や公募増資といった伝統的な資金調達が困難な業績不振の企業や新興企業です。彼らにとってEvo Fundは迅速に資金を供給してくれる、いわば「最後の貸し手」なのです。 しかし、その代償は既存株主が支払います。Evo Fundが権利を行使するたびに新株が発行され、あなたが持つ株1株あたりの価値が薄まる「持分希薄化」を必然的にもたらします。 [caption id="attachment_138115" align="aligncenter" width="504"] 持分希薄化 を 参加者が増えピザに比喩した図[/caption] パーティーの途中で後から来た参加者のためにピザがどんどん小さく切り分けられていくように、あなたの資産価値は機械的にそして継続的に減少していくのです。この「いつか必ず売られる大量の株式」は常に株価の上値を重くする、将来の売り圧力として存在し続けます。 罠② 現在の売り圧力 ― 公式資料も認める「空売りヘッジ」 Evo Fundによる売りは未来の話だけではありません。彼らはリスク管理のプロとして、新株を手に入れる前から「空売り」を仕掛ける準備をしています。これは憶測ではなく、発行体である株式会社メタプラネットが2025年6月6日に開示した公式資料の中でその具体的な準備行為がはっきりと記されている事実です。 資料の14ページには、Evo Fundが「本新株予約権のための貸株契約を締結する予定」であると明記されています 。この「貸株契約」は、彼らがヘッジ目的で株式を市場で売却(空売り)するための準備に他なりません。 [caption id="attachment_138114" align="aligncenter" width="773"] 25/6/6にだされた新株予約権のお知らせP14より抜粋[/caption] では、なぜ彼らは空売りを行うのでしょうか。 本新株予約権の行使価額は株価に連動するため、新株を受け取るまでの間に株価が下落するとEvo Fundも損失を被る可能性があります。そのリスクを相殺(ヘッジ)するために、あらかじめ同じ銘柄を借りてきて市場で空売りしておくのは彼らにとっては極めて合理的なリスク管理手法です。 しかし、その合理的な行動が市場にとっては「現在の売り圧力」として重くのしかかります。 つまり投資家は「将来、権利行使によって売られる運命の株」と「今まさに、ヘッジ目的で売られているかもしれない空売り」という、二重の売り圧力の中で極めて不利な戦いを強いられることになるのです。 最悪のシナリオ「デス・スパイラル」とその悲劇的な結末 この二重の売り圧力が企業の業績悪化や市場全体の地合いの悪化などを引き金に破滅的な連鎖反応を起こすことがあります。それが、MSワラントが内包する最大のリスク「デス・スパイラル」です。 メカニズム:株価が下がるほど、破滅が近づく悪循環 デス・スパイラルのメカニズムは、一度始まると止めることが困難な負のフィードバックループです。 【引き金】 企業の業績悪化や悪いニュースなどをきっかけに、株価が下落を始めます。 【下方修正】 株価に連動して、MSワラントの行使価格(新株の発行価格)も、自動的に引き下げられます。 【必要株数の天文学的増加】 例えば、企業が10億円を調達したい場合、株価1000円なら100万株の発行で済みます。しかし株価が100円に暴落すると、同じ10億円を調達するために1000万株もの新株発行が必要になります。 【パニック】 「発行済株式総数を上回る新株発行の可能性」といった見通しが市場に伝わると、致命的な希薄化懸念を呼び、既存株主によるパニック的な投げ売りを誘発します。 【無限地獄】 株価暴落が、さらなる発行株数の増加を招き、株価が1円、あるいはそれ以下になるまで下落が止まらない…という悪循環が完成します。 事例1:急転直下の破滅「テラ社の悲劇」 このデス・スパイラルの恐怖を日本の市場参加者の記憶に最も強く刻み付けたのが、かつての人気バイオベンチャー「株式会社テラ」の事例です。 再生医療への期待から株価は高騰しましたが、事業は恒常的な資金難に喘ぎ、MSワラントによる資金調達を繰り返しました。その結果はまさにデス・スパイラルの教科書でした。 増資のたびに株価は下落し、それが次の大規模な希薄化を呼び…という悪循環の末、株価は数年で数百分の1以下に。最終的に2022年に自己破産を申請し上場廃止となり、多くの投資家の夢と資産を文字通り「紙クズ」に変えました。 事例2:緩やかな価値の死「ピクセラ社のケース」 Evo Fundが長年、筆頭株主として関与してきた「ピクセラ株式会社」は異なる形の結末を示唆します。ピクセラ社はEvo Fundから何度も資金供給を受け、そのたびに株価が低迷。株価が1円に近づくと「株式併合」(例:10株を1株にまとめることで、見かけ上の株価を10倍にする)を繰り返してきました。 テラ社のように急激に破滅するわけではありません。しかし、株式併合をすればあなたが持っている株数も10分の1になり、資産価値は実質的に大きく毀損します。 これは、急激な破滅ではなく株主の価値だけがじわじわと、しかし確実に毀損されていく「緩やかな死」と言えるでしょう。Evo Fundが事業転換を支える「パートナー」としての一面を見せる裏で既存株主は静かに価値を削られていくのです。 [ad_area] 国内仮想通貨取引所「OKJ」は、毎日・毎週・隔週・毎月のいずれかのプランで1,000円~200,000円からビットコイン (BTC) の積立購入サービスを提供しています。時間がなく忙しいあなたでもビットコインの投資が行えます。 現在、OKJの口座開設者は1,000円分のビットコインがもらえる限定キャンペーンが実施中。すでにほかの取引所の口座を持っている方もぜひ登録しておきましょう。 OKJで口座を開設する [/ad_area] 「三重の罠」から資産を守るための具体的な防御術 では、個人投資家はこの「三重の罠」にどう立ち向かえば良いのでしょうか。感情的な期待を排し、冷静な分析に基づいた具体的な防御策が不可欠です。 企業の「体力」を徹底的に調査する まず、なぜその企業がMSワラントのような「劇薬」に頼らざるを得ないのか、その根本原因を突き止めなければなりません。企業のIR情報や決算短信を読み込み、以下の点を最低限確認しましょう。 本業のキャッシュフロー: 事業活動で現金を稼げているか、それとも常に営業赤字か。キャッシュフロー計算書の「営業活動によるキャッシュ・フロー」がマイナスの企業は、外部からの資金供給が止まれば事業継続が困難になる、極めて脆弱な状態です。 財務状況(自己資本比率): 企業の総資産のうち、返済不要な純資産がどれくらいの割合を占めるかを示す「自己資本比率」を確認します。一般的に、この比率が20%を下回ると財務的な危険水域と見なされます。財務が脆弱な企業ほど、デス・スパイラルに陥るリスクは高まります。 事業の将来性: 手掛けている事業は、そもそも成長市場にあるのか。ITやバイオなど、成功すれば大きなリターンが見込める分野か、それとも構造的に厳しい業界かを見極めます。 Evo Fundの「動き」を常に監視する Evo Fundの動きは、EDINET(金融商品取引法に基づく開示書類に関する電子開示システム)で誰でも、無料でリアルタイムに確認できます。これは、投資家にとって最強の武器です。 【EDINETの具体的な使い方】 EDINETのサイトにアクセスし、「書類検索」画面を開きます。 「提出者(ファンド名、個人名など)」の欄に「Evo Fund」の提出者コードである「E11943」を入力して検索します。 検索結果から、お目当ての企業の「変更報告書」を探します。 報告書内の「株券等保有割合」の増減を確認します。特に、この割合が「減少」に転じた場合、それはEvo Fundが市場で株式を売却し、利益確定を始めたという極めて重要なサインです。 株価が天井を打つ直前には彼らが売り抜けているケースが非常に多く見られます。彼らの動きを監視することは、高値掴みを避け、適切なタイミングで撤退するための生命線となります。 「熱狂」と「希薄化」を天秤にかける 「BTC購入」というニュースがもたらす熱狂とその裏で進む「株式の希薄化」という現実を冷静に天秤にかける必要があります。 MSワラントでどれだけ株が増えるのか、そのインパクトを概算で掴むことが重要です。企業の適時開示資料には発行される新株予約権の数とそれによって最大で何株の新株が発行される可能性があるかが記載されています。 例えば「現在の発行済株式数が1,000万株」で、「ワラントによって新たに最大で1,000万株が発行される」可能性がある場合、もし全ての権利が行使されれば、株数は2倍になります。これは、あなたの持つ1株の価値が理論上、将来半分になる可能性があることを意味します。株価が2倍以上にならなければあなたの資産価値は実質的に増えないのです。この単純な計算だけでも熱狂に浮かされることなく、リスクを冷静に評価する助けとなります。 最終結論:あなたは歴史の教訓から目を逸らしますか? Evo Fundが関わる銘柄がもたらす短期的な熱狂は非常に魅力的かもしれません。しかし、その裏には、 将来の売り圧力(希薄化) 現在の売り圧力(空売りヘッジ) 最終的な破滅シナリオ(デス・スパイラル) という「三重の罠」が常に存在します。 デス・スパイラルは机上の空論ではなく、テラ社の事例が示すように実際に市場で何度も繰り返されてきた現実です。「今度こそ大丈夫」という根拠のない期待は過去の数多の悲劇の前ではあまりに無力です。 投資家として自らの資産を守るために唯一できることはこのリスクの全体像を冷静に理解し、そもそもなぜその企業が「劇薬」に頼らざるを得ないのか、その根本的な財務・事業上の問題から決して目を逸らさないことです。 [ad_area] 国内仮想通貨取引所「OKJ」は、毎日・毎週・隔週・毎月のいずれかのプランで1,000円~200,000円からビットコイン (BTC) の積立購入サービスを提供しています。時間がなく忙しいあなたでもビットコインの投資が行えます。 現在、OKJの口座開設者は1,000円分のビットコインがもらえる限定キャンペーンが実施中。すでにほかの取引所の口座を持っている方もぜひ登録しておきましょう。 OKJで口座を開設する [/ad_area] 出典・参考資料 公式サイト・IR情報 Evolution Financial Group 公式サイト EVOLUTION JAPAN証券株式会社 公式サイト 株式会社メタプラネット、株式会社ピクセラ等の各社公式サイトおよびIR情報ページ 規制当局提出資料 金融庁 EDINET(電子開示システム)におけるEVO FUNDの大量保有報告書・変更報告書 IR BANK、株探 等の大量保有報告書データベース 業界・市場データおよび報道 日本証券業協会、東京証券取引所 提供の各種統計データ 免責事項 ・本記事は情報提供のために作成されたものであり、暗号資産や証券その他の金融商品の売買や引受けを勧誘する目的で使用されたり、あるいはそうした取引の勧誘とみなされたり、証券その他の金融商品に関する助言や推奨を構成したりすべきものではありません。 ・本記事に掲載された情報や意見は、当社が信頼できると判断した情報源から入手しておりますが、その正確性、完全性、目的適合性、最新性、真実性等を保証するものではありません。 ・本記事上に掲載又は記載された一切の情報に起因し又は関連して生じた損害又は損失について、当社、筆者、その他の全ての関係者は一切の責任を負いません。暗号資産にはハッキングやその他リスクが伴いますので、ご自身で十分な調査を行った上でのご利用を推奨します。

特集・コラム
2025/06/20メタプラネット株価80倍の“仕掛け人” EVO FUNDとは何者か?その投資哲学と「BTCドーピング」の錬金術
2024年から2025年にかけ、株価が一時80倍にも高騰したメタプラネット社。このシンデレラストーリーの裏で、その成長を資金面から支え、巨大なリターンを手にした影の主役がいます。その名は「EVO FUND」。 「大量保有報告書でよく見る名前だけど、一体何者?」「なぜメタプラネットに巨額の資金を提供できるのか?」 本稿では、謎に包まれた投資ファンド「EVO FUND」の正体に迫ります。彼らの投資哲学、そして「BTCドーピング」とも呼ばれるムーブメントを可能にする、驚くべき“錬金術”の仕組みを徹底的に解き明かします。 関連記事 : メタプラネットは”信念”を貫けるか?『BTCドーピング』により株価が崩壊する”3つの試練”と運命の分岐点 - Crypto Times [ad_area] 国内仮想通貨取引所「OKJ」は、毎日・毎週・隔週・毎月のいずれかのプランで1,000円~200,000円からビットコイン (BTC) の積立購入サービスを提供しています。時間がなく忙しいあなたでもビットコインの投資が行えます。 現在、OKJの口座開設者は1,000円分のビットコインがもらえる限定キャンペーンが実施中。すでにほかの取引所の口座を持っている方もぜひ登録しておきましょう。 OKJで口座を開設する [/ad_area] EVO FUNDの正体:日本市場に特化したプロフェッショナル集団 グローバルな組織と百戦錬磨の経営陣 EVO FUNDは、2002年にマイケル・L・ラーチ氏が設立したエボリューション・ファイナンシャル・グループの中核をなす、ケイマン諸島籍の投資ファンドです 。グループ全体では世界10拠点に500人のスタッフを擁しますが、驚くべきことにその半数以上の250人超が日本で活動しており、いかに日本市場を重視しているかが伺えます。 その日本における執行機関が、東京・紀尾井町のニューオータニ ガーデンコートに拠点を置く「EVOLUTION JAPAN証券」です 。 創業者であるマイケル・L・ラーチ氏は、プリンストン大学を卒業後、世界の主要投資銀行で約10年間キャリアを積んだ人物で、現在もグループの全投資の最終決定権を握るグローバル最高投資責任者を兼任しています 。 彼を支える法務責任者のリチャード・G・チザム氏(カリフォルニア大学ヘイスティングス法科大学院卒)や、日本法人代表で金融業界30年のベテランであるショーン・M・ローソン氏(国際基督教大学卒、メリルリンチ日本証券元責任者)など、経営陣は金融のプロフェッショナルで固められています 。 投資哲学と日本市場での圧倒的実績 彼らは、巷で囁かれるような短期的な利益のみを追求する「ハゲタカファンド」とは一線を画す、独自の哲学と行動規範を掲げています。 純投資パートナー: 経営権の取得を目的とせず、あくまで企業の成長を資金面から支える「純粋な投資家」としての立場を貫く。 企業文化: 「進化し続けること」「協力すること」「市場参加者としての自覚」を行動規範とし、責任ある市場参加者としての役割を重視。 日本市場への特化: 20年以上にわたり日本の上場企業、特に中小型株への投資を専門としており、日本の市場環境や規制に精通。 PIPES市場の支配者: 上場企業に対する私募増資(PIPES)の分野では、2024年に首位を獲得するなど、圧倒的な実績を誇る。これまでに63社へ投資し、提出した大量保有報告書は1,746件に上る 。その通算取引金額は、2019年時点で450億米ドル(約6兆円)に達する。 つまりEVO FUNDとは、突如現れた謎の存在ではなく、長年にわたり日本の資本市場で独自の地位を築き上げてきた、したたかなプロフェッショナル集団なのです。 EVO FUNDの「投資の錬金術」:その手法と進化 主力武器「MSワラント」の仕組みとリスク EVO FUNDが「BTCドーピング」の仕掛け人となり得る最大の理由は、彼らが得意とする「MSワラント(行使価額修正条項付新株予約権)」という特殊な資金調達手法にあります 。 これは、一言で言えば「企業の株価が上がれば上がるほど、より多くの資金を調達できる」仕組みです 。 [caption id="attachment_138006" align="aligncenter" width="366"] MS Warrantの図[/caption] 【MSワラントの仕組み】 企業は、将来一定の価格で新株を買える権利(新株予約権)をEVO FUNDに第三者割当で発行。 企業の株価が上昇すると、新株予約権の行使価格もそれに連動して上方修正される仕組み 。 EVO FUNDは、高くなった価格で権利を行使して新株を取得し、それを市場で売却することで、企業に多額の資金を払い込む。 このサイクルにより、「BTC価格上昇 → 株価上昇 → 資金調達額増加 → さらなるBTC購入」という強力な好循環が生まれる。 この手法は、資金を必要とする企業にとっては、株価が好調な時に柔軟かつ大規模な資金調達ができるという大きなメリットがあります 。しかしその一方で、新株が大量に発行されるため、既存の株主が持つ1株あたりの価値が薄まる「持分希薄化」という重大なリスクを内包していることを忘れてはなりません 。 進化形「EVO-ZERO™」:業界を変える一手 さらにEVO FUNDは、2023年11月に「EVO-ZERO™」という、より革新的なスキームを導入しました 。これは、従来の第三者割当増資で一般的だった慣習を打ち破るものです。 ディスカウントゼロ: 従来8~10%が当たり前だった株価のディスカウントを完全撤廃 。 制約条件ゼロ: 企業の将来の資金調達を縛るロックアップや先買権も要求無し。 「なぜそんな好条件を提示できるのか?」という疑問に対して、彼らが案件ごとに最低収益を定めない独立ファンドであること、少数精鋭でコストが低いこと、そして多数の案件を手掛けることで単独案件での収益確保の必要性が相対的に低いこと、と考察しています。これにより、企業との良好な関係を築き、リピート率20%以上という高い信頼を得ているのです 。 [ad_area] 国内仮想通貨取引所「OKJ」は、毎日・毎週・隔週・毎月のいずれかのプランで1,000円~200,000円からビットコイン (BTC) の積立購入サービスを提供しています。時間がなく忙しいあなたでもビットコインの投資が行えます。 現在、OKJの口座開設者は1,000円分のビットコインがもらえる限定キャンペーンが実施中。すでにほかの取引所の口座を持っている方もぜひ登録しておきましょう。 OKJで口座を開設する [/ad_area] ケーススタディ:EVO FUNDの投資戦略と実績 最大の成功事例:メタプラネット このMSワラントを駆使したEVO FUNDの戦略が、最も劇的な形で成功したのがメタプラネットの事例です 。 関与と影響力: 2024年頃から本格的に関与し、2025年2月には最大で発行済株式の28.17%を保有する筆頭株主となり、同社のBTC戦略に強い影響力を持つに至る 。 利益確定の実行: メタプラネットの株価が20円から1,600円へと80倍に高騰する過程で、EVO FUNDは保有比率を4.45%まで段階的に引き下げています 。これは、高値圏で巧みに株式を売却し、利益を確定させていることを示唆している。 驚異的なリターン: 独自の分析では、EVO FUNDは数十億円規模の投資に対し、数百億円規模(推定リターン10倍以上)という、まさに「錬金術」と呼ぶにふさわしいリターンをこの案件で得たと推定 。同社の「555ミリオン計画」(2027年末までに21万BTC保有を目指す)も、EVO FUNDの資金調達支援なくしては成り立たない。 横展開されるBTC戦略:リミックスポイントとマックハウス EVO FUNDの戦略は、メタプラネットだけで終わっていません。彼らはこの成功スキームを、他の投資先にも「横展開」しています 。 リミックスポイント (3825): 同様にEVO FUNDの支援を受け、BTC保有量を1,000BTCまで拡大させています 。EVO FUNDは最大約56億円の調達を支援しました 。 マックハウス (7603): 2025年6月19日、メタプラネットとほぼ同じスキームでEVO FUNDを割当先とし、最大17億円超のBTC購入を発表しました 。 この動きは、EVO FUNDが日本市場で「BTC投資のイネーブラー(促進者)」として、意図的にブームを創出し、主導していることを強く示唆しています 。 投資パターンの多様性:長期支援の実績 一方で、EVO FUNDは短期的なBTCテーマだけでなく、より時間のかかる投資も手掛けています。その投資回収パターンは、以下の3つに分類できます。 短期高収益型: メタプラネットのように、1~2年で10倍以上のリターンを狙う 。 中期安定型: リミックスポイントのように、3~5年で3~5倍のリターンを目指す 。 長期育成型: フルッタフルッタのように、5年以上の長期にわたり事業基盤の強化を支援する 。 特に、215件もの大量保有報告書を提出しているピクセラ (6731)の事例では、同社が従来のデジタル機器製造から、IoTやWeb3といった成長分野へ事業転換するのを、長期にわたって資金面から支え続けています 。これは、彼らが単なる投機家ではなく、企業の変革を支えるパートナーとしての一面も持つことの証明です。 競合との差別化:なぜEVO FUNDは選ばれるのか 日本の投資市場には、KKRやベイン・キャピタルのような大手国際系ファンドや、日本産業パートナーズ(JIP)のような国内大手ファンドも存在します 。しかし、EVO FUNDは彼らとは全く異なる土俵で戦っています。 大手ファンドが巨額の資金で企業の経営権を取得する「バイアウト」を中心とするのに対し、EVO FUNDは経営権を求めず、上場したままの中小型企業にPIPESという手法で迅速に資金を供給することに特化しています 。 その独自の強みは、「投資手法の革新性(EVO-ZERO™など)」「意思決定の迅速性(自己資金によるトップダウン)」「PIPES市場での圧倒的な実績」に集約されます 。大手ファンドが参入しないニッチな市場で、他にないソリューションを提供すること。それが、EVO FUNDが企業から選ばれ続ける理由です。 まとめ:EVO FUNDはパートナーか、投資のマエストロか EVO FUNDの姿を解き明かすと、二つの顔が見えてきます。 一つは、経営権を求めず、企業の革新的な挑戦や事業再生を資金面で支える「純投資パートナー」としての顔。彼らがいなければ、メタプラネットの壮大なBTC戦略は始まらなかったかもしれません。 しかし、もう一つは、MSワラントやEVO-ZERO™といった金融技術を駆使し、市場の熱狂を巧みに利用して、最終的に巨額の利益を手にする「投資のマエストロ(名人)」としての顔です。 EVO FUNDが関わる銘柄に投資するということは、この両方の側面を理解し、企業の成長ストーリーに期待すると同時に、彼らの出口戦略(売り抜け)のリスクを常に意識する必要があることを意味します。彼らは、日本の資本市場にダイナミズムをもたらす重要な存在であると同時に、その戦略の裏側を冷静に見つめる必要がある、極めて手ごわいプレーヤーなのです。 [ad_area] 国内仮想通貨取引所「OKJ」は、毎日・毎週・隔週・毎月のいずれかのプランで1,000円~200,000円からビットコイン (BTC) の積立購入サービスを提供しています。時間がなく忙しいあなたでもビットコインの投資が行えます。 現在、OKJの口座開設者は1,000円分のビットコインがもらえる限定キャンペーンが実施中。すでにほかの取引所の口座を持っている方もぜひ登録しておきましょう。 OKJで口座を開設する [/ad_area] 出典・参考資料 公式サイト・IR情報 Evolution Financial Group 公式サイト EVOLUTION JAPAN証券株式会社 公式サイト 株式会社メタプラネット、株式会社リミックスポイント、株式会社ピクセラ等の各社公式サイトおよびIR情報ページ プレスリリース・適時開示 EVOLUTION JAPAN証券株式会社 プレスリリース 革新的スキーム「EVO-ZERO™」の発表 2023年度PIPES市場における首位獲得について TDnet(適時開示情報閲覧サービス)における各投資先企業の開示情報 規制当局提出資料 金融庁 EDINET(電子開示システム)におけるEVO FUNDの大量保有報告書・変更報告書 IR BANK、株探 等の大量保有報告書データベース 業界・市場データおよび報道 日本証券業協会、東京証券取引所 提供の各種統計データ 免責事項 ・本記事は情報提供のために作成されたものであり、暗号資産や証券その他の金融商品の売買や引受けを勧誘する目的で使用されたり、あるいはそうした取引の勧誘とみなされたり、証券その他の金融商品に関する助言や推奨を構成したりすべきものではありません。 ・本記事に掲載された情報や意見は、当社が信頼できると判断した情報源から入手しておりますが、その正確性、完全性、目的適合性、最新性、真実性等を保証するものではありません。 ・本記事上に掲載又は記載された一切の情報に起因し又は関連して生じた損害又は損失について、当社、筆者、その他の全ての関係者は一切の責任を負いません。暗号資産にはハッキングやその他リスクが伴いますので、ご自身で十分な調査を行った上でのご利用を推奨します。

特集・コラム
2025/06/17メタプラネットは”信念”を貫けるか?『BTCドーピング』により株価が崩壊する”3つの試練”と運命の分岐点
今、日本の株式市場で最も熱い視線を集める企業、メタプラネット社。2024年4月にビットコイン購入方針を発表後、当時約20円だった株価は、1年余りで一時80倍を超えるという驚異的な上昇を記録しました。しかしこの現象は、同社だけの特別な物語ではありません。 国内においてもエス・サイエンス社やANAPホールディングスなどがBTCを購入するための資金調達を発表。海外でも2024年から2025年にかけてSemler Scientific社やDeFi Technologies社などが追随し、今、国内外でBTCを購入することで株価を上げる「BTCドーピング」とでも呼ぶべきムーブメントが静かに広がっています。(BTCドーピングは筆者が命名) これは、円資産のリスクをヘッジする「信念」の物語か。それとも、株価を急騰させ資金調達を行う、投機的な「ドーピング」に過ぎないのか。 筆者が考える結論から言えば、現在のメタプラネット社は、その両方の側面を併せ持つ「ハイブリッド型」と見るのが的確かと考えています。そして、この戦略の行く末を占う上で避けては通れない「3つの試練」が存在します。本稿では、歴史的な教訓や国内外の事例も交えながら、その運命の分岐点を探ります。 [ad_area] 国内仮想通貨取引所「OKJ」は、毎日・毎週・隔週・毎月のいずれかのプランで1,000円~200,000円からビットコイン (BTC) の積立購入サービスを提供しています。時間がなく忙しいあなたでもビットコインの投資が行えます。 現在、OKJの口座開設者は1,000円分のビットコインがもらえる限定キャンペーンが実施中。すでにほかの取引所の口座を持っている方もぜひ登録しておきましょう。 OKJで口座を開設する [/ad_area] 「BTCドーピング」時代の到来と歴史の教訓 国内外で広がるドーピング企業とその末路 メタプラネットの株価急騰は、決して日本だけの現象ではありません。筆者の調査によれば、海外でも同様の事例が散見されており、下記は海外企業がビットコインを購入発表したのちのデータです。 Semler Scientific (米国): 医療機器メーカーがBTC購入を発表し株価は+37%急騰。しかし、その後のBTC価格調整でピーク比-55%の急落。 DeFi Technologies (カナダ): BTC採用発表で株価+26%。直後に大規模な増資枠を設定するも、株価は不安定に。 Long Blockchain (米国): 飲料メーカーが社名変更しただけで株価3.8倍。しかし実態が伴わず、後にSECから上場廃止処分に。 これらの事例が示すのは、BTC購入という「魔法の言葉」の効力がいかに短期的なものであるか、そしてその反動がいかに大きいかという事実です。 歴史は繰り返すのか?ドットコムバブルが示す未来 暗号通貨市場においては草コインに資金が集まり、価格を上げると最後はすべてのマーケットが市場崩壊するという場面が何度も散見されました。これには暗号通貨への資金流入の減少、草コインに対して高掴みをしたプレイヤーが損をした結果退場するなどのことから見られます。 それでは株式市場においても同様のことは起きるのでしょうか? 結論、暗号通貨特有の極端なボラティリティは制度面で緩和されていますが、同様のメカニズムは歴史上繰り返されています。そのため、現在のようにBTCを購入することをプレスリリースで発表し、株価をあげ、資金調達を行ういわばBTCドーピングブームは、歴史上、何度も繰り返されてきた光景です。 1999年のドットコムバブルでは、多くの企業が社名に「.com」と付けるだけで、事業実態がなくても株価は何十倍にもなりました。しかし、そのほとんどは利益を生み出せず、資金が尽きた途端に市場から姿を消しました。現在の「BTC購入」というキーワードは、当時の「.com」と同じ熱狂を生み出してはいないでしょうか。 また、記憶に新しい2021年のSPACやEV(電気自動車)ブームでも、特定のテーマに資金が集中し、その後多くの関連銘柄の価値が70〜90%も失われました。テーマ株への熱狂とその後の崩壊は、株式市場の常なのです。 小型テーマ株の連鎖崩落モデルとしては、 株価= (本業利益+BTC 評価益株式数) / 株価 という形で表されます。そのため、BTC が 30% 下落した場合、評価益が消失し、市場は PER の再計算を迫られる。増資で“株式数”が膨らんでいれば希薄化効果が増幅し、段階的な下方修正ラッシュ → 失望売り → 流動性枯渇という草コイン崩壊と類似のプロセスを辿りやすいこととなります。 メタプラネットの運命を分ける「3つの試練」 [caption id="attachment_137843" align="aligncenter" width="769"] メタプラネットを船に例えた3つの試練の図[/caption] 歴史の教訓を踏まえた上で、メタプラネットがこれらの先行事例と同じ道を辿らないために乗り越えるべき「3つの試練」を、マイクロストラテジー社の事例と比較しながら見ていきましょう。 試練①:「BTC長期低迷の冬」と資金調達の罠 現在のメタプラネット株価の強さは、「BTC購入発表 → 株価急騰 → 高値で資金調達(主にMSワラント) → さらなるBTC購入」という強力な好循環エンジンに支えられています。しかし、このエンジンは「BTC価格と自社株価が上昇し続ける」という燃料がなければ回りません。 もし、1年以上続くような「BTCの冬」、つまり長期低迷期が訪れた場合、このサイクルは無慈悲に逆回転を始めます。株価が低迷すれば、ワラントによる資金調達は極めて困難になり、燃料(資金)が枯渇。BTCの追加購入どころか、企業の存続すら危ぶまれる「資金調達不能」というシナリオが現実味を帯びてきます。 一方、先行するマイクロストラテジー社も、2022年に訪れた厳しい「暗号の冬」を経験しています。当時、同社の株価も大きく下落しましたが、戦略を維持し、むしろ安値でBTCを買い増すことさえできました。なぜなら、彼らの資金調達手段は、短期的な株価に依存するワラントだけでなく、長期の転換社債など多角化されており、何よりも後述する本業が財務を支えていたからです。 さらに、後発であることは構造的な不利を伴います。マイクロストラテジーがBTCを買い始めた2020年当時と比べ、現在のBTC価格は遥かに高水準です。これからBTCドーピングに参入する企業は必然的に“高値掴み”のリスクを負うことになり、同じ価格下落幅でも、より早く、より深刻な財務ダメージを受けることになるのです。 試練②:「本業の収益化」とドーピングへの依存度 2つ目の試練は、メタプラネット自身の「稼ぐ力」です。「本業のキャッシュフローが成長か赤字依存か」は企業の真の体力を測る上で最も重要です。この点において、メタプラネットとマイクロストラテジーの構造的な違いは決定的です。 [caption id="attachment_137847" align="aligncenter" width="513"] 上場直後から2020年までのマイクロストラテジー社の財務データ分析グラフ[/caption] 上記の画像は筆者が作成した上場直後から2020年にBTCを購入するまでにおける、マイクロストラテジー社の財務データ分析グラフになります。 マイクロストラテジー社が“信念”を貫ける最大の理由は、BTC戦略を開始する以前から続く、ビジネスインテリジェンス(BI)ソフトウェア事業という強力な本業があるからです。この事業は安定したキャッシュフローを生み出し続け、BTC戦略の「安全弁」であり「生命線」となっています。彼らにとってBTC戦略は財務戦略の柱ですが、現在のメタプラネットにとっては「事業そのもの」に近い状態です。 過去、音楽事業やホテル事業で苦戦した歴史を持つメタプラネットが、現在構想するコンサルティング等のBTC関連事業で、市場が納得するだけのキャッシュフローを生み出せるか。これが、同社が単なる「ドーピング企業」への依存から脱却し、マイクロストラテジーのようにBTC戦略を支えるだけの安定した基盤を持つ、本物の「信念型」企業へと進化できるかを左右する、決定的な分岐点となります。 参考記事 :【株価1800円超え】なぜメタプラネット社は日本経済の未来を賭け、BTC(ビットコイン)を買い続けるのか? - Crypto Times 試練③:「会計上の時限爆弾」と減損ショック 最後の試練は、会計ルールに仕組まれた「時限爆弾」です。国際的な会計基準では、企業が保有するBTCには極めて厄介な「非対称なリスク」が伴います。 減損会計の非対称リスクとは? 企業が保有するBTCは「無形固定資産」として扱われます。この会計ルールでは、BTC価格が購入時より上昇しても、その「含み益」は決算書の利益には計上されません。しかし、価格が購入時より下落すると、その「含み損」は「減損損失」として利益から差し引かなければなりません。つまり、利益は計上されず、損失だけが財務諸表を直撃するのです。 この「減損」の発生を左右するのが、ビットコインの取得単価です。マイクロストラテジーは、特に初期に非常に低い単価で大量のBTCを取得できたため、価格下落に対する強力なバッファ(緩衝材)を持っています。例えば、取得単価が3万ドルであれば、BTC価格が5万ドルに下落しても会計上の損失は発生しません。しかし、取得単価が7万ドルの企業は、同じ5万ドルへの下落で巨額の減損損失を計上せざるを得ません。取得単価が低ければ低いほど、この会計上の時限爆弾の導火線は長くなるのです。 この減損ショックは、マイクロストラテジーも実際に経験した道です。彼らは2022年の弱気相場で、累計で数十億ドルという巨額の減損損失を計上しました。しかし、それでも戦略が破綻しなかったのは、市場や投資家が「これはキャッシュの流出を伴わない会計上の評価損だ」と同社の長期戦略を理解していたこと、そして何より本業の利益が会計上の損失の衝撃を和らげ、財務の健全性に対する信頼を維持できたからです。 メタプラネットや今後参入する企業が、取得単価が高いという不利を乗り越え、同様の減損局面に直面した時、市場の信頼を維持できるかが厳しく問われます。以下の「リスク連鎖シナリオ」は、この衝撃に耐えられない企業を襲う、現実的な負のスパイラルなのです。 BTC価格下落 → 評価損発生 → 決算で「減損損失」を計上 → 純資産が毀損 → 財務内容悪化でコベナンツ(財務制限条項)違反 → 保有BTCの強制売却へ 結論:投資家が監視すべき「運命の分岐点」 メタプラネットの物語は、大きなトレンドの一部です。彼らが「信念型」の偉大な企業となるか、「ドーピング型」のテーマ株として歴史に消えるかは、これから訪れる「3つの試練」を乗り越えられるかに懸かっています。 私たち投資家は、熱狂に踊らされることなく、この運命の分岐点を冷静に監視し続ける必要があります。具体的には、以下の点を常にチェックすべきです。 BTC価格の長期トレンドと、他のドーピング企業の動向(試練①の兆候) 四半期決算における、本業のキャッシュフローと利益(試練②の進捗) 保有BTCの取得原価と時価を比較し、減損リスクを把握すること(試練③の時限爆弾) ワラント行使による株式の希薄化と、経営陣の自社株売買(EDINETで確認) メタプラネットが示した(少なくとも短期的な)株価の成功は、今後、日本市場で「第二、第三のメタプラネット」を生み出す呼び水となるでしょう。 同じようにBTC購入を宣言し、投資家の夢を煽る企業が次々と現れるかもしれません。 しかし、本稿で分析した通り、後発企業はより高い取得単価という構造的な不利を背負うことになります。安易にその熱狂に飛びつくのではなく、本稿で提示したチェックリストを用いて、その企業が「信念型」か、単なる短期的な「ドーピング型」なのかを、より一層厳しく見極める必要があります。 メタプラネットがこれらの試練にどう立ち向かうのか、その一挙手一投足こそが、株価の未来を最も雄弁に物語るでしょう。 [ad_area] 国内仮想通貨取引所「OKJ」は、毎日・毎週・隔週・毎月のいずれかのプランで1,000円~200,000円からビットコイン (BTC) の積立購入サービスを提供しています。時間がなく忙しいあなたでもビットコインの投資が行えます。 現在、OKJの口座開設者は1,000円分のビットコインがもらえる限定キャンペーンが実施中。すでにほかの取引所の口座を持っている方もぜひ登録しておきましょう。 OKJで口座を開設する [/ad_area] 免責事項 ・本記事は情報提供のために作成されたものであり、暗号資産や証券その他の金融商品の売買や引受けを勧誘する目的で使用されたり、あるいはそうした取引の勧誘とみなされたり、証券その他の金融商品に関する助言や推奨を構成したりすべきものではありません。 ・本記事に掲載された情報や意見は、当社が信頼できると判断した情報源から入手しておりますが、その正確性、完全性、目的適合性、最新性、真実性等を保証するものではありません。 ・本記事上に掲載又は記載された一切の情報に起因し又は関連して生じた損害又は損失について、当社、筆者、その他の全ての関係者は一切の責任を負いません。暗号資産にはハッキングやその他リスクが伴いますので、ご自身で十分な調査を行った上でのご利用を推奨します。


 有料記事
有料記事